Replacing the thermal compound from a boxed Intel CPU fan
Intel processors have not exactly been known for spectacular thermal performance with the included fans, but the issue I recently had with my soon-to-be-four-year-old Intel Core i5-4570 (Haswell) just about takes the cake.
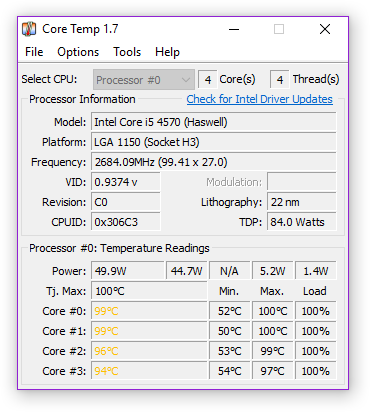
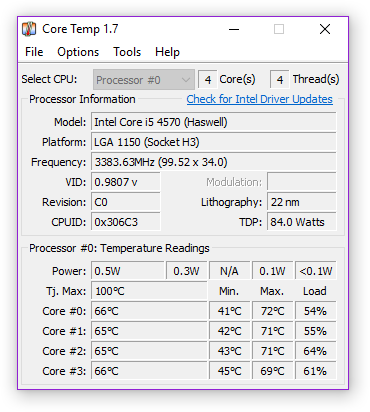
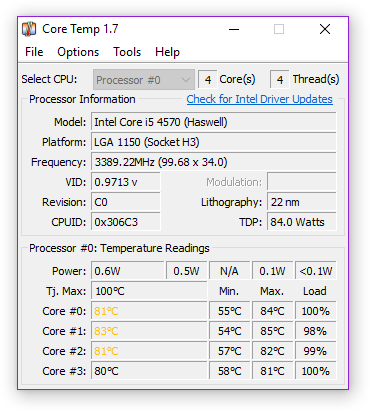
I noticed that my processor was hitting its maximum operating temperature of 100°C when playing CPU-intensive games such as Dishonored 2, Grand Theft Auto V and Battlefield 1, and generally staying well above 90 degrees during gameplay. My PC never shut down in response to this — not even once — but it was throttling quite significantly, going even lower than its base clock of 3.2 GHz, once all the way down to 2.7 GHz at the very worst according to Core Temp:
I thought perhaps the fans and the heat sink needed dusting off, but besides the non-trivial amounts of dust on the case fans and the CPU fan, there actually wasn’t much dust on the heat sink itself at all. Still I had them dusted, and I checked the temperatures. No dice: my processor was still capping off at 100 degrees. My big brother suggested that I replace the thermal compound that came with the boxed fan.
There are numerous articles and videos out there that demonstrate
- how to remove a boxed (stock) Intel or AMD CPU cooler,
- how to remove an aftermarket CPU cooler,
- how to remove existing thermal compound from a CPU and its cooler,
- how to apply thermal compound, regardless of the CPU cooler being used,
- how to attach a boxed Intel or AMD CPU cooler, and
- how to attach an aftermarket CPU cooler
and generally these work the same way no matter what CPU cooling solution you’re using. Except they’re all disjointed, meaning you have to connect the dots yourself, which can be intimidating if you’ve never done this procedure before.
Fortunately, Intel has illustrated guides for removing and reattaching a boxed CPU fan as well as replacing thermal compound on an Intel CPU on their website. The former also appears in the manual for my Intel Core i5-4570. (Bet you didn’t know that processors came with manuals.) But what if you really just wanted a single point of reference detailing the steps from start to finish?
That’s why I decided to write this post in hopes that it will help others who, like me, don’t use aftermarket CPU coolers for any reason (budget constraints, lack of interest in overclocking, etc), and, albeit not quite as much like me, prefer a single, complete guide. Granted there is a bit of storytelling in this one, but I hope it makes things interesting rather than distracting.
Table of contents
- What you need
- Removing the fan
- Removing the old thermal compound
- Applying the new thermal compound
- Reinstalling the fan
- My results
What you need
My big brother let me have some of the Noctua NT-H1 that came with his NH-D15, and I went to the pharmacy (which is really ironic since I’d just had to go to the doctor on Easter) to buy some denatured alcohol for getting the old thermal compound off:
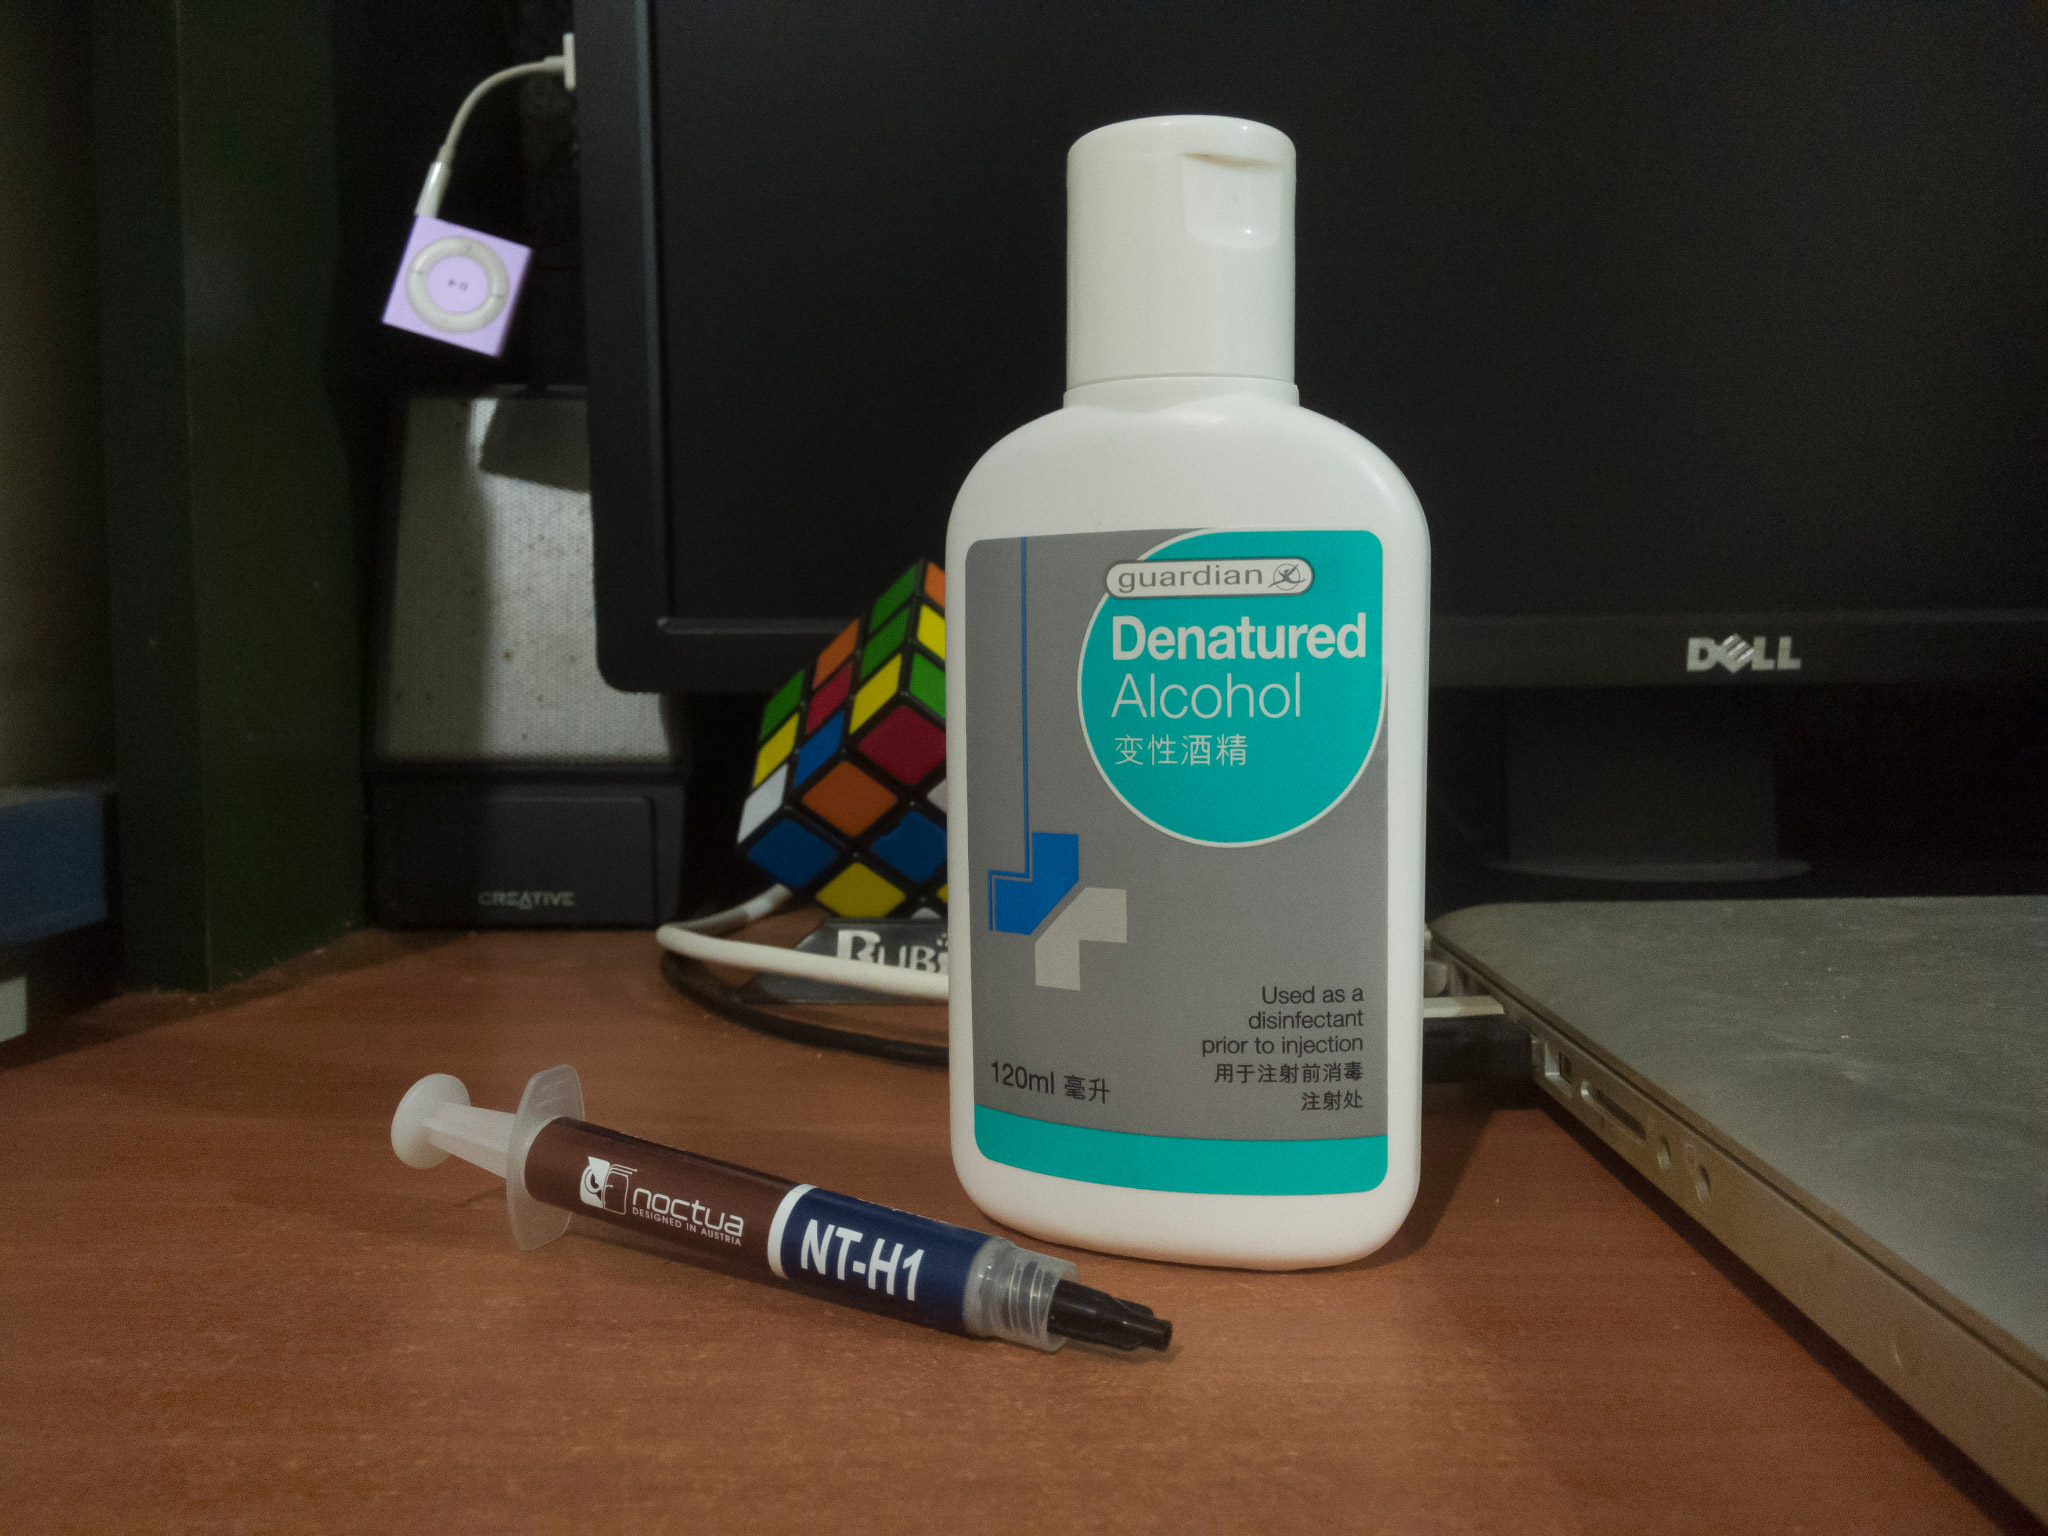
Isopropyl alcohol works too. In fact, denatured alcohol might well actually be denatured isopropyl alcohol. Confusing, huh?
Of course, you’re not going to just drench your components in alcohol to get the old stuff off. I favor precision so I used cotton swabs, but I’m told that kitchen paper works just as well if you’re looking for macro efficiency.
You’ll also want to lay your case on its side (with the CPU fan facing up, obviously) to allow gravity to help you rather than work against you, both when applying the new thermal compound and when reseating the fan over your processor.
Removing the fan
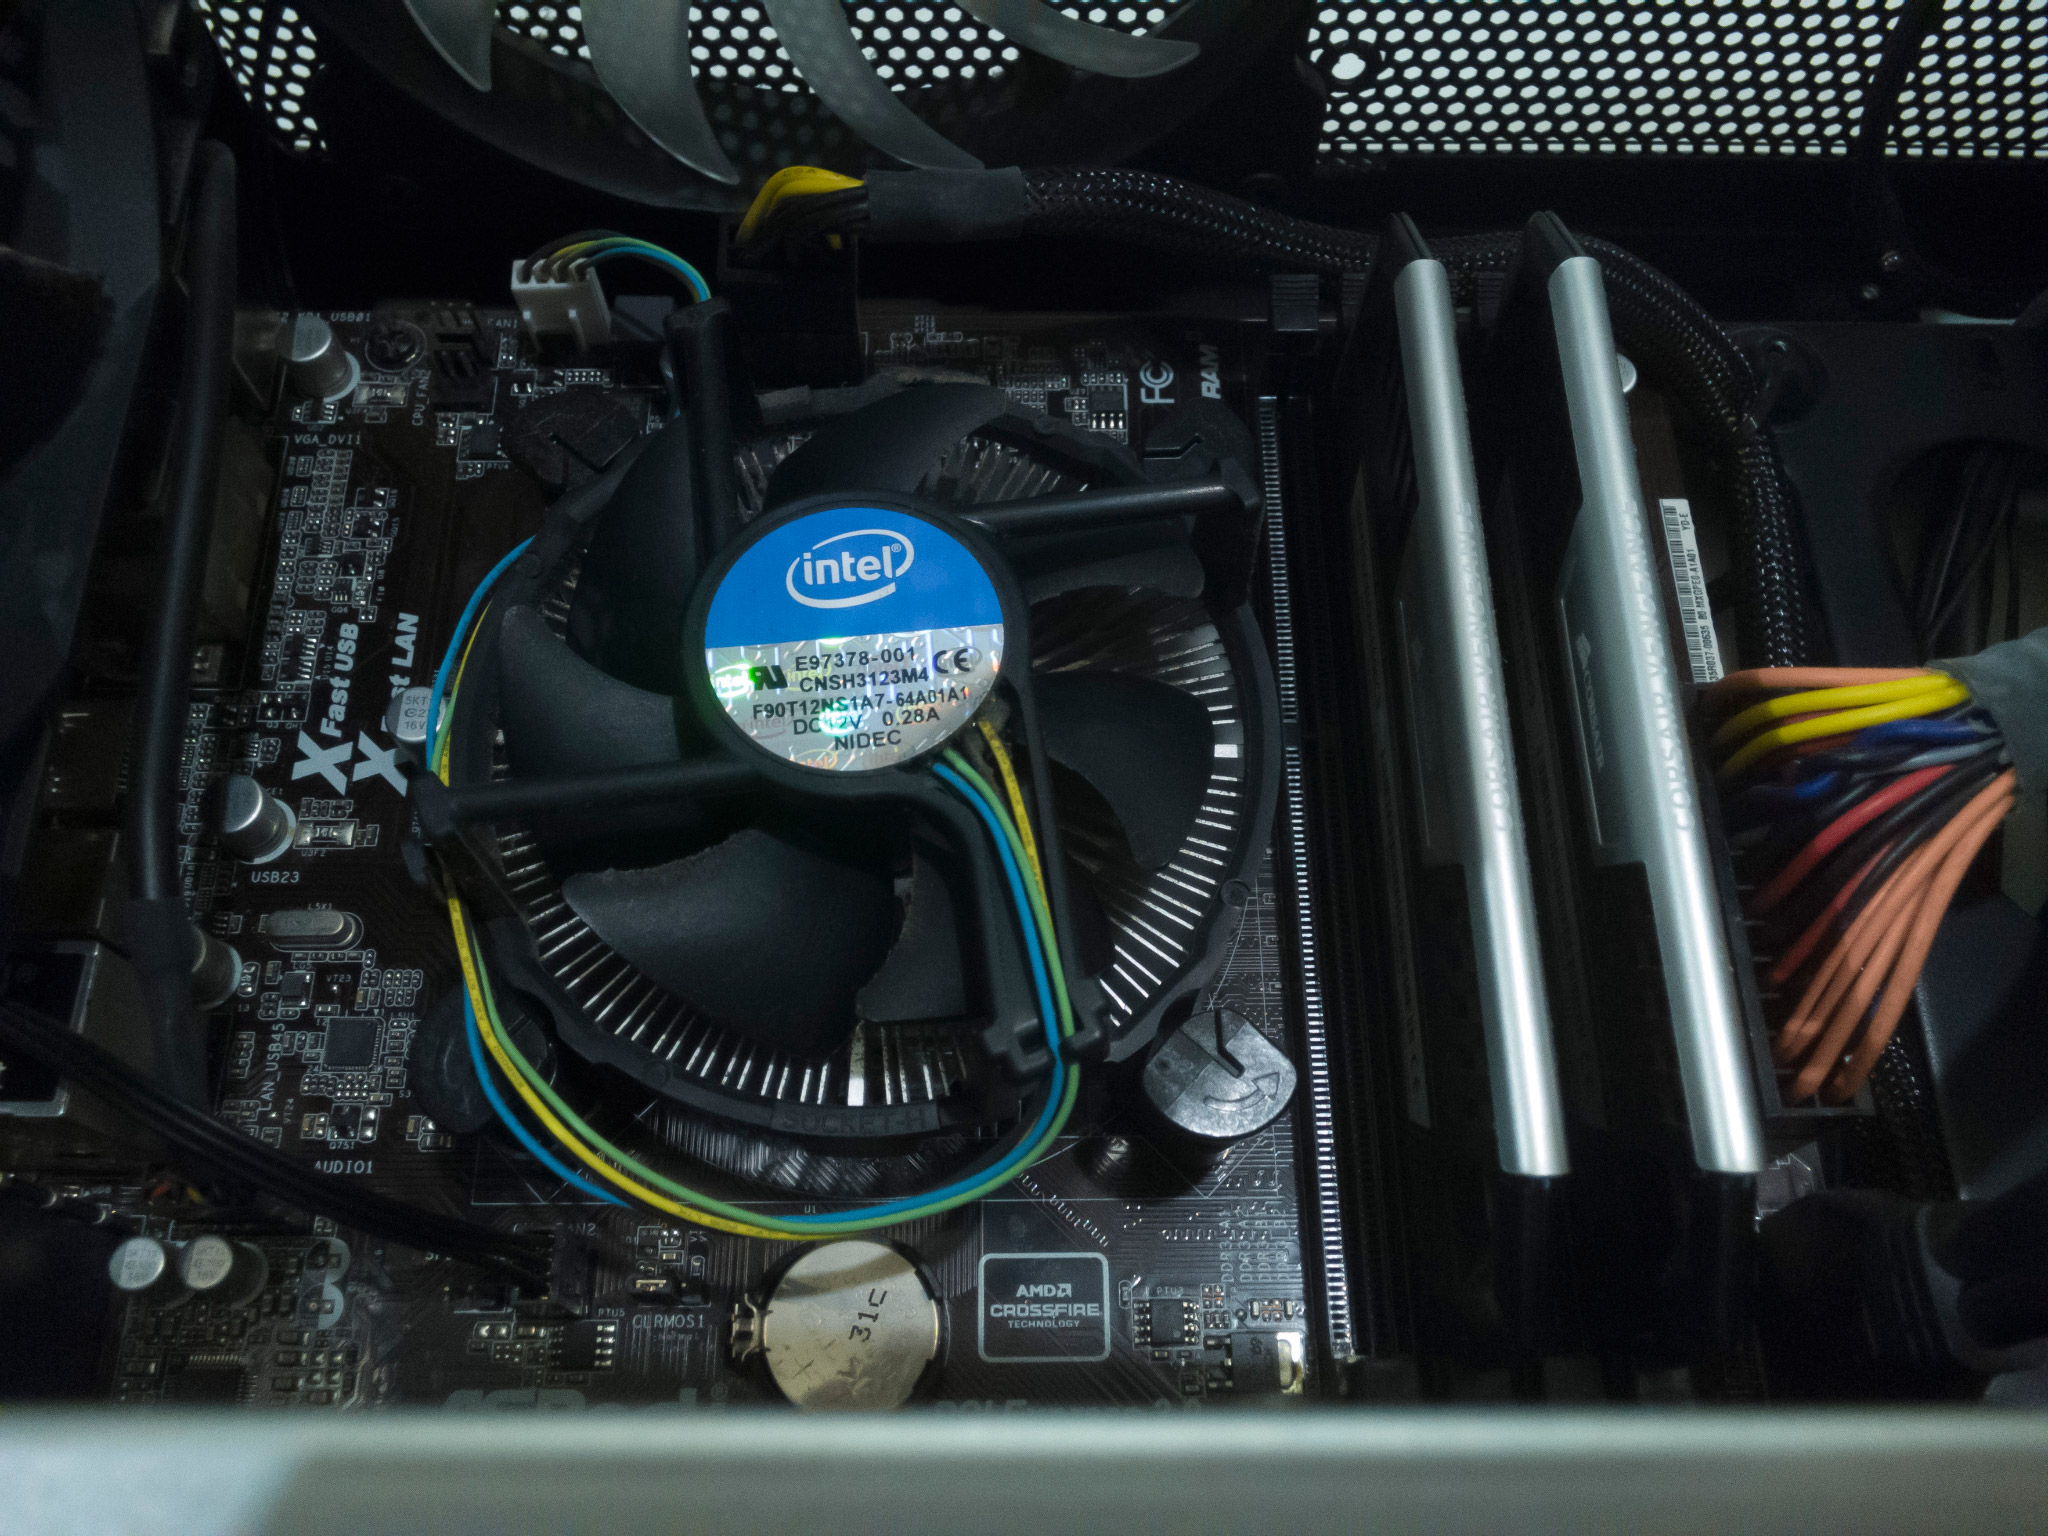
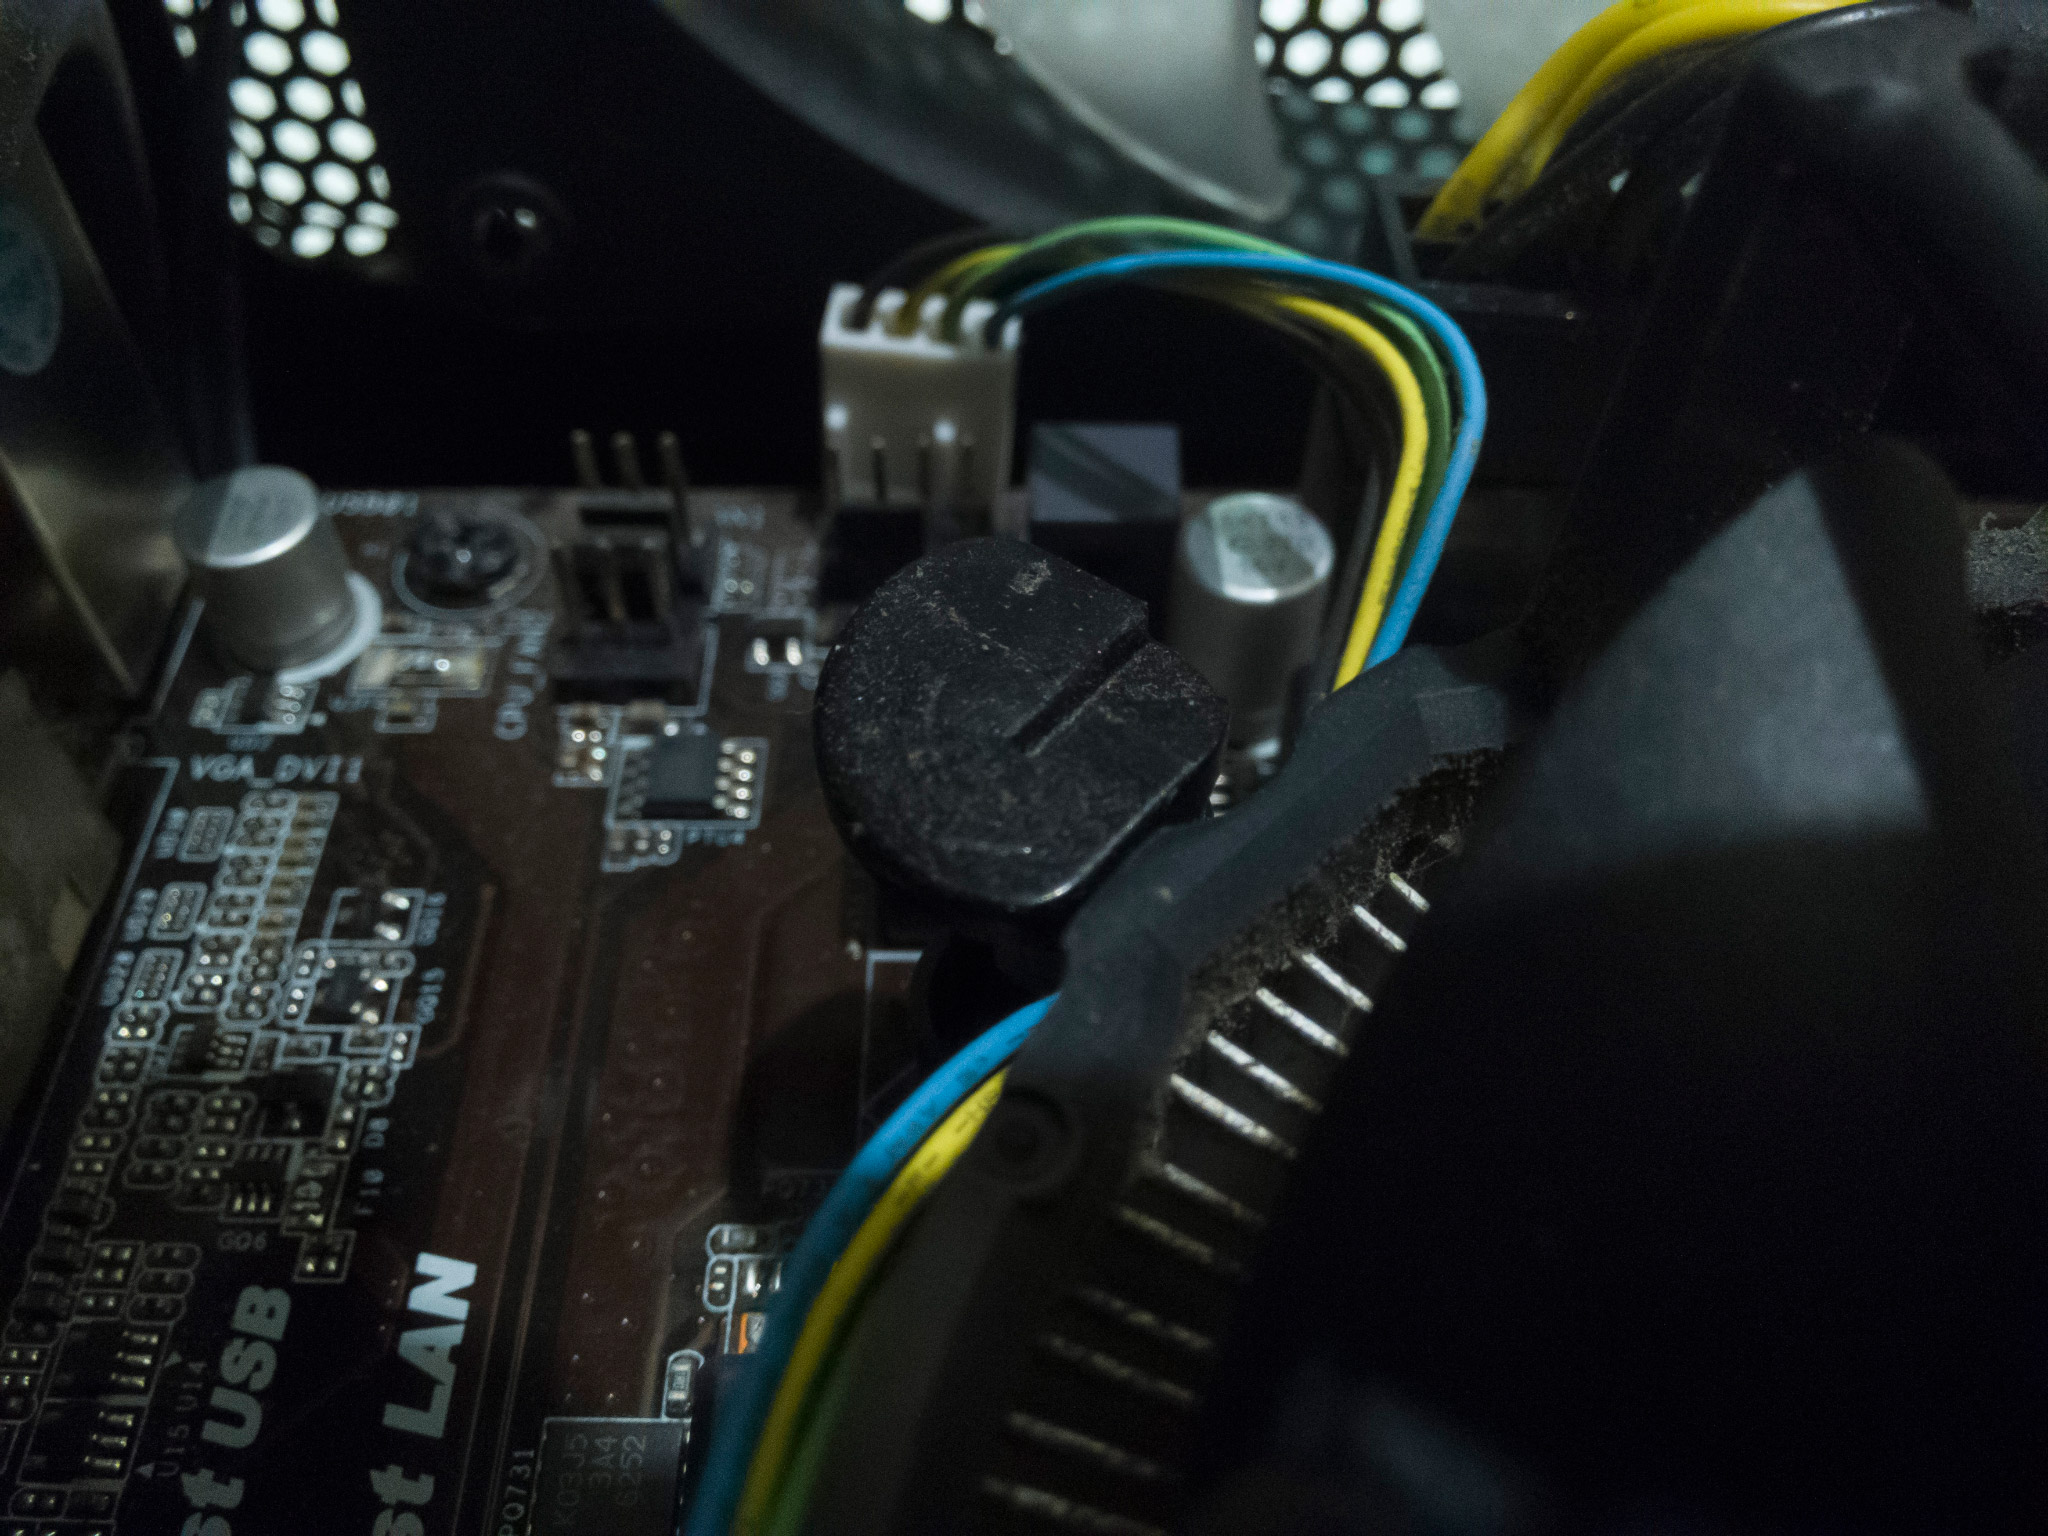
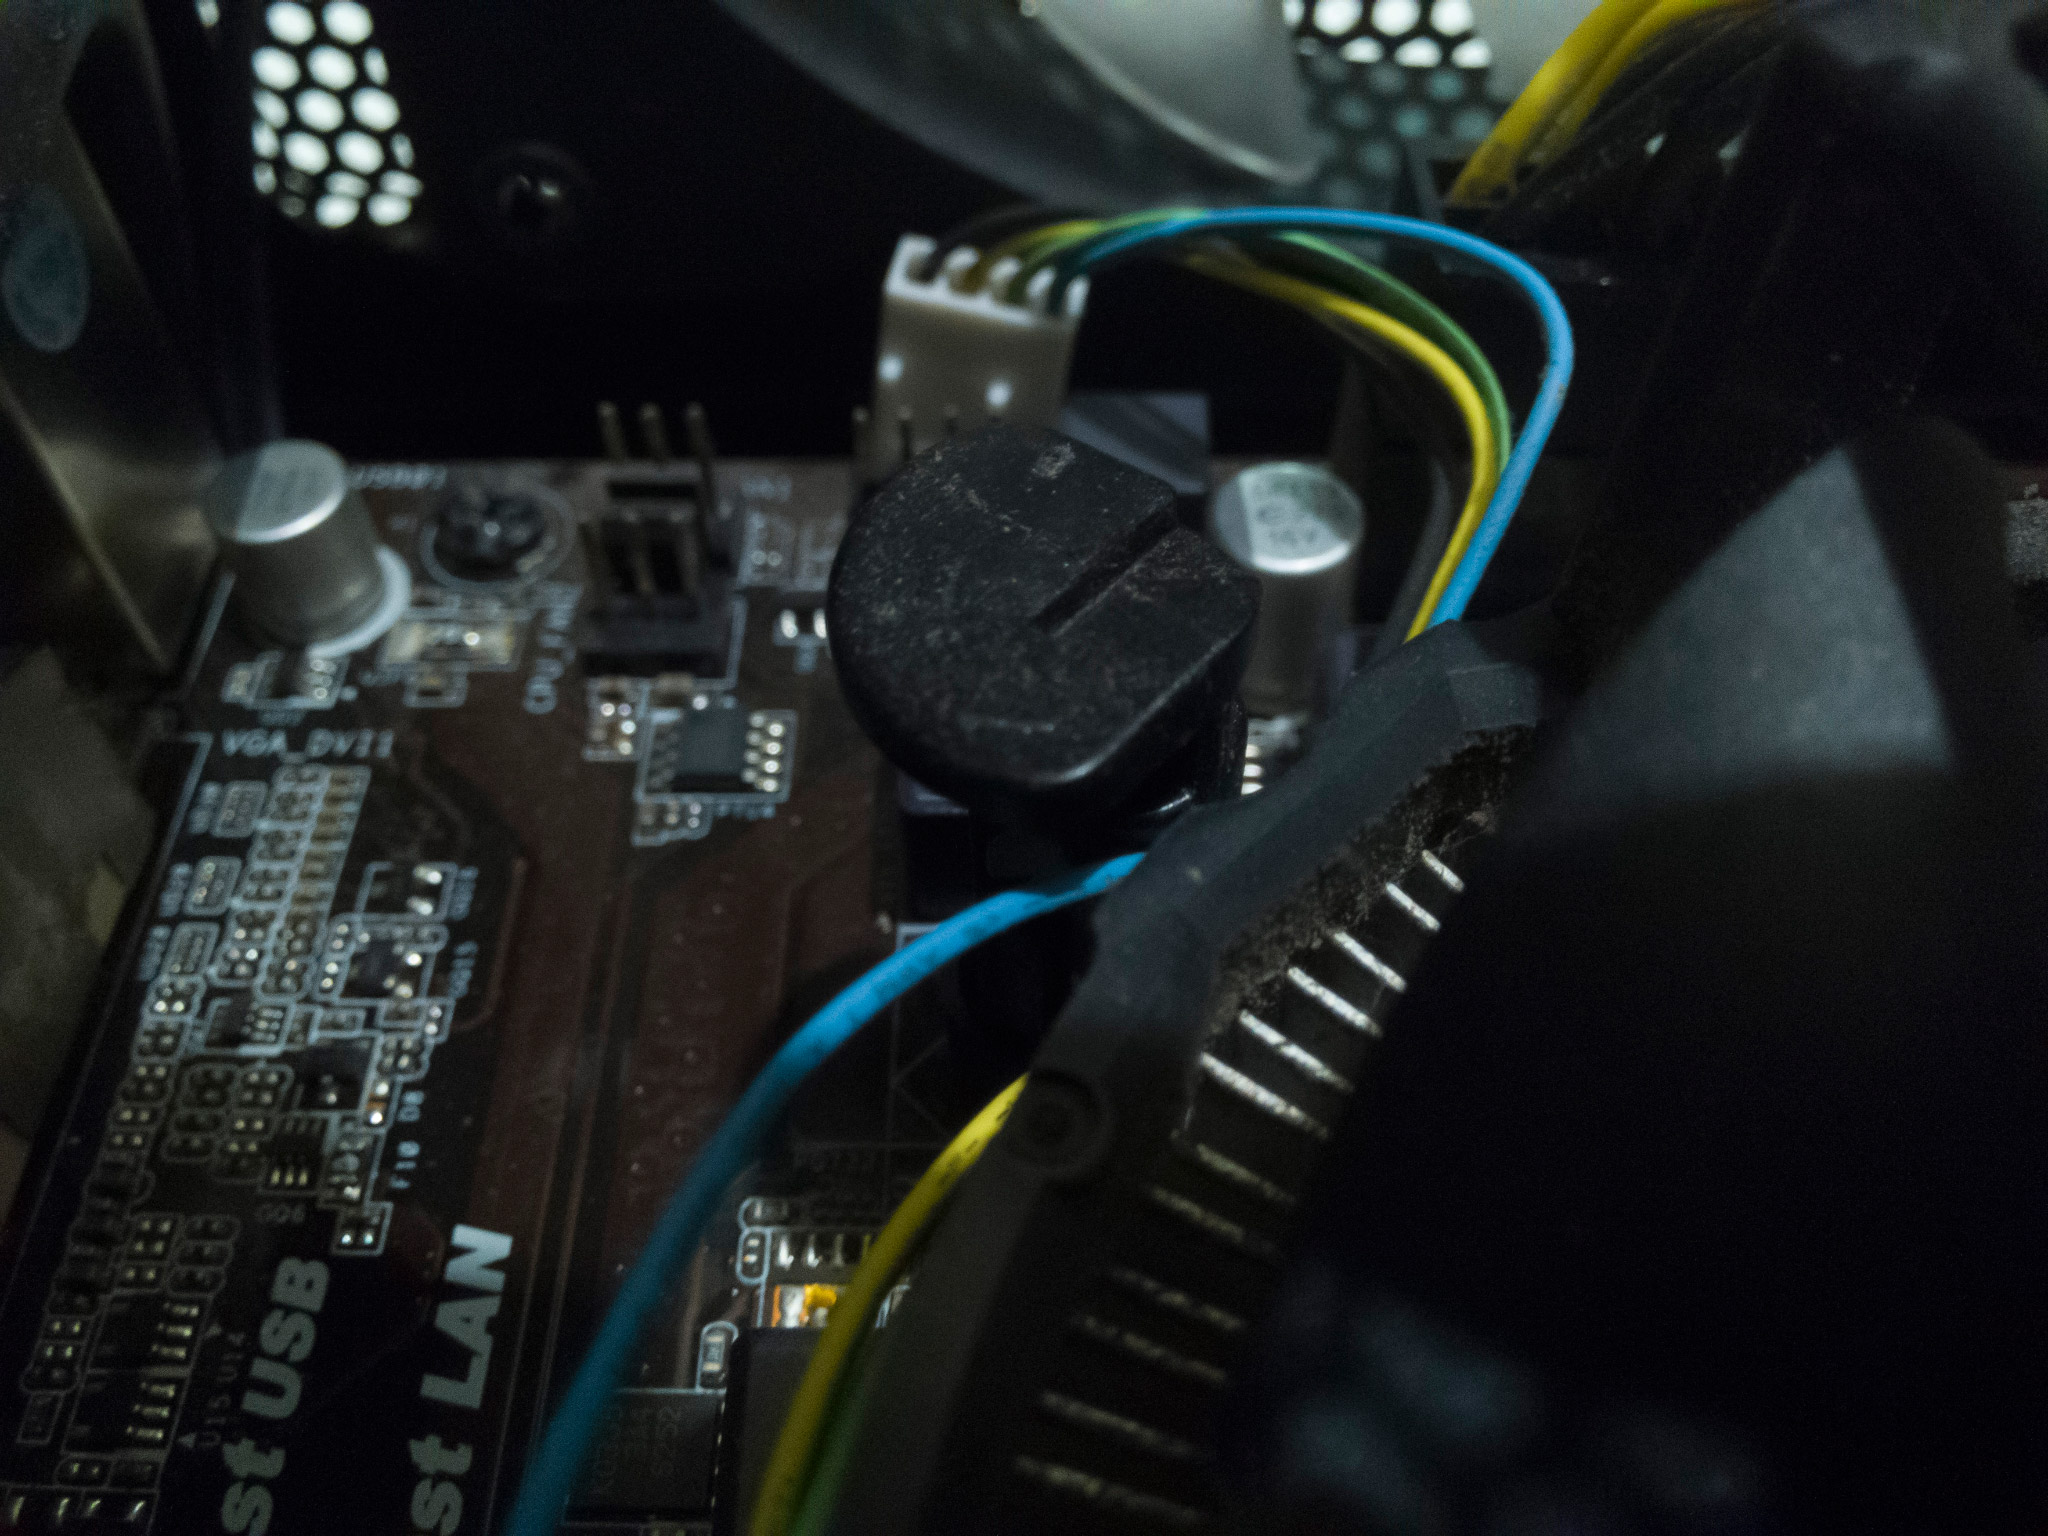
If you installed the boxed Intel CPU fan yourself, you probably remember the four push pins that you had to press to secure the fan and heat sink onto your motherboard. If not, here’s what they look like:
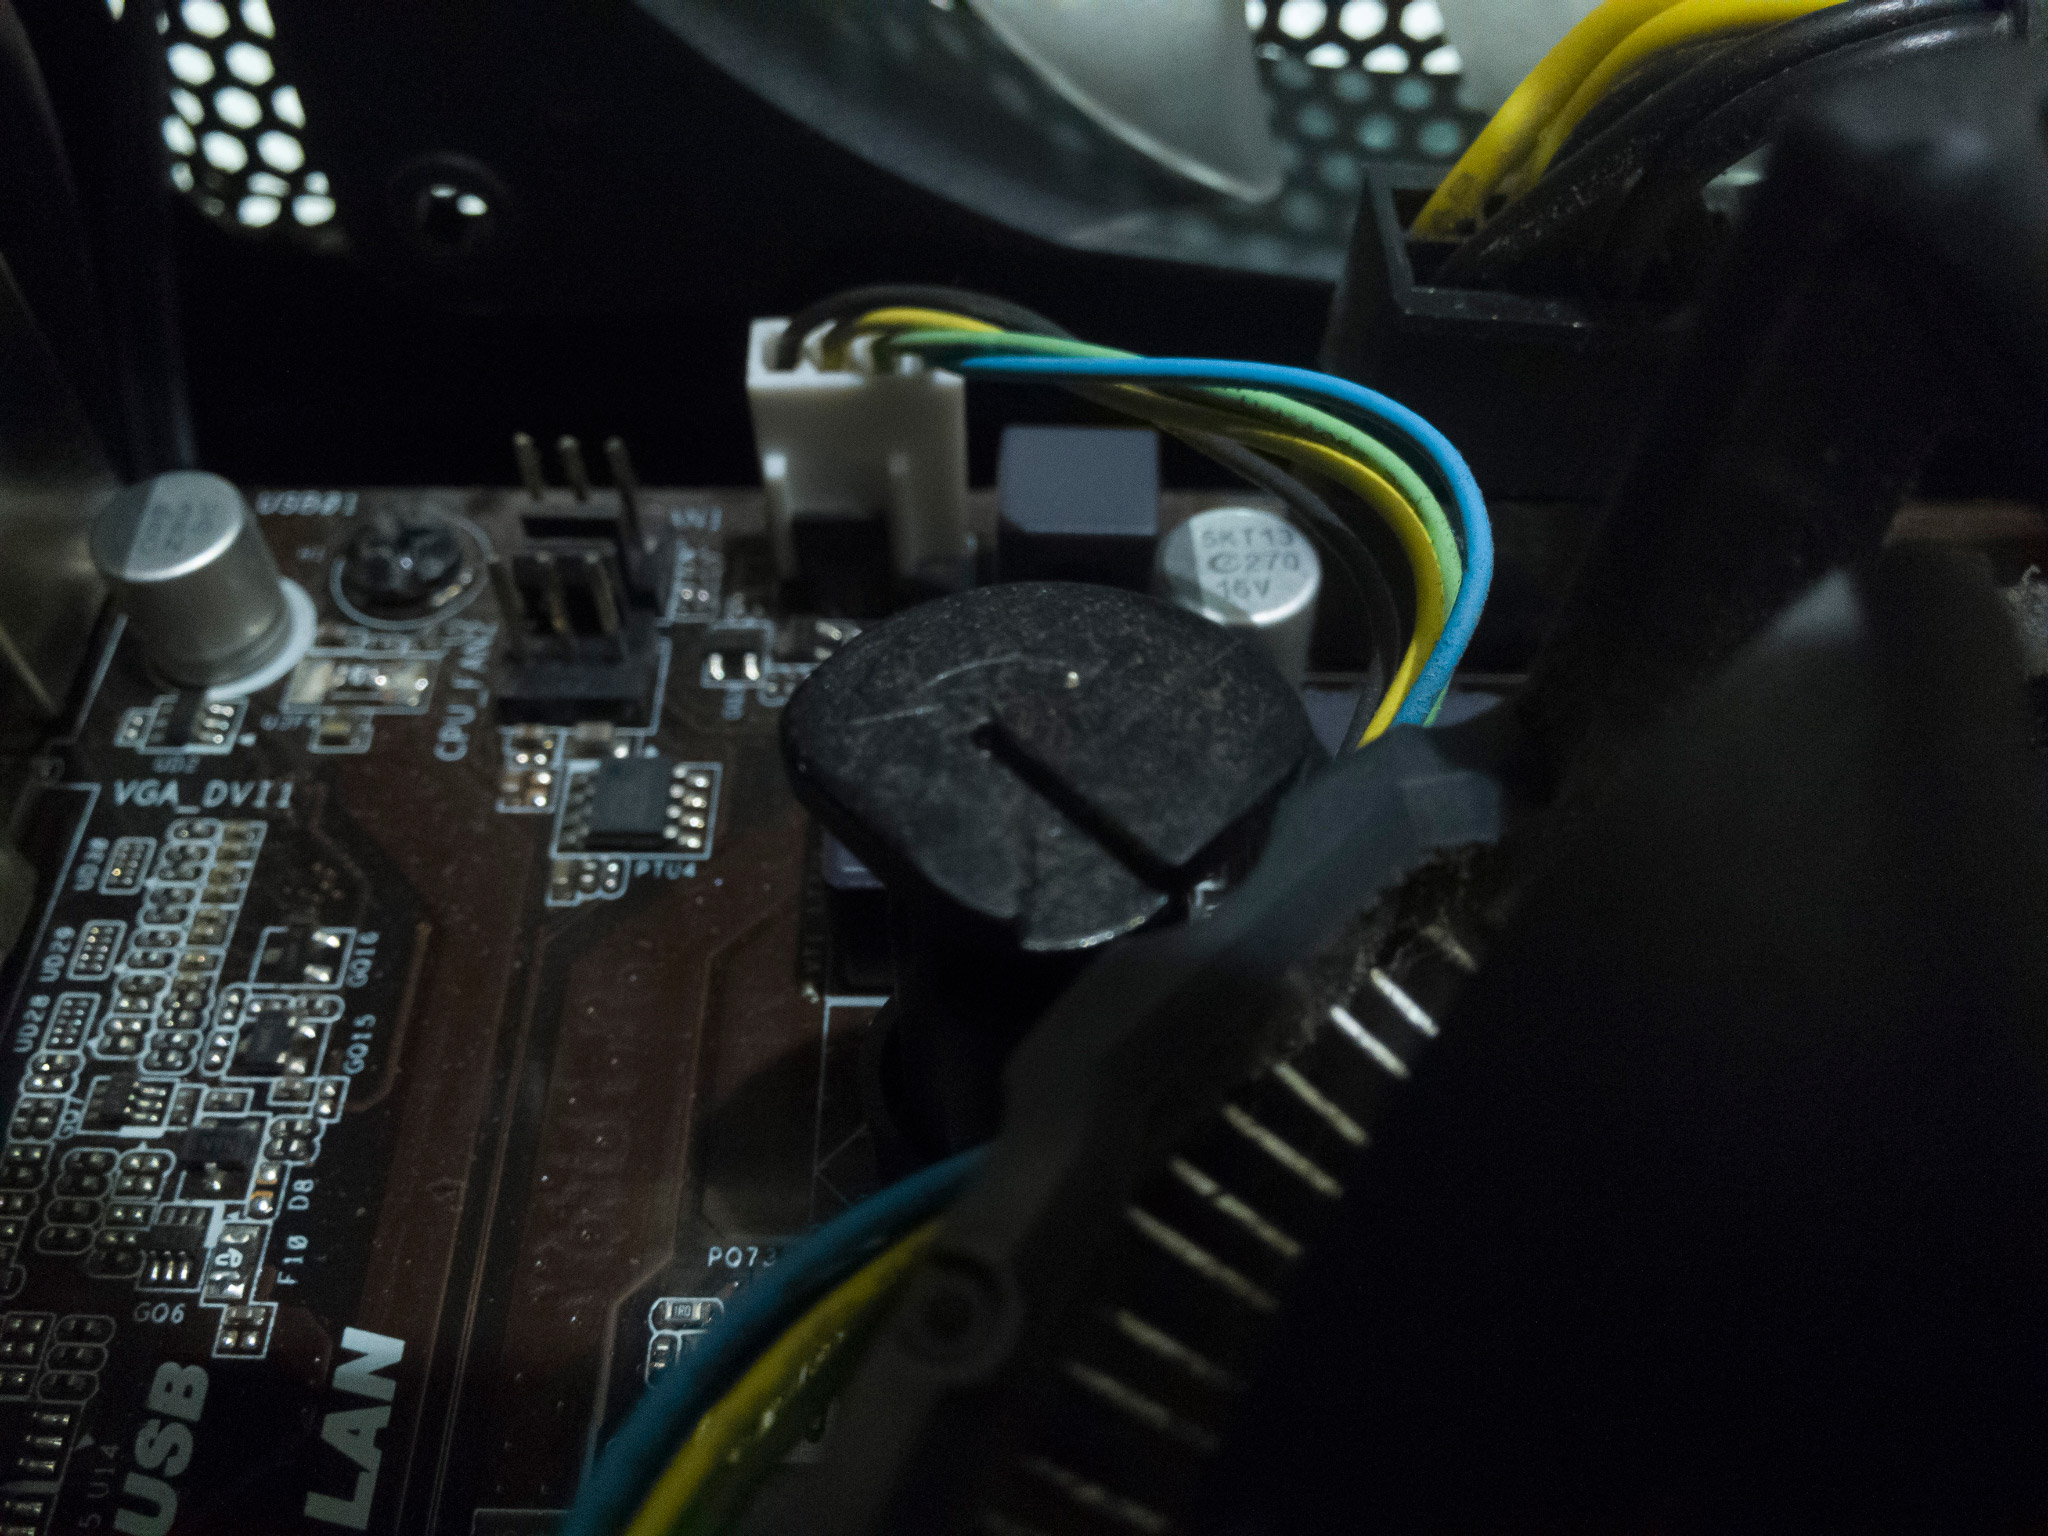
First things first, be sure to unplug the fan connector from the header. This one’s easy to miss! You don’t want to pull the fan out only to catch the fan cable and potentially break something.
You need to turn each push pin 90° anticlockwise to release it. There’s a slot for you to fit a screwdriver into to make this easier. Then pull the push pin upward. I had a bit of trouble with this, no matter how hard I pulled, but I found that lifting my case and pinching the clips at the underside of the motherboard helped tremendously (but this will only work if your case has a cutout for you to access those clips!).
Once all four push pins have been released, you should be able to just grab the sides of the heat sink and lift the fan up with little effort. If your fan seems stuck, it might be the clips at the ends of the push pins on the underside of your motherboard that are keeping it down. That’s what happened in my case, which led to me pinching them in order to free the push pins.
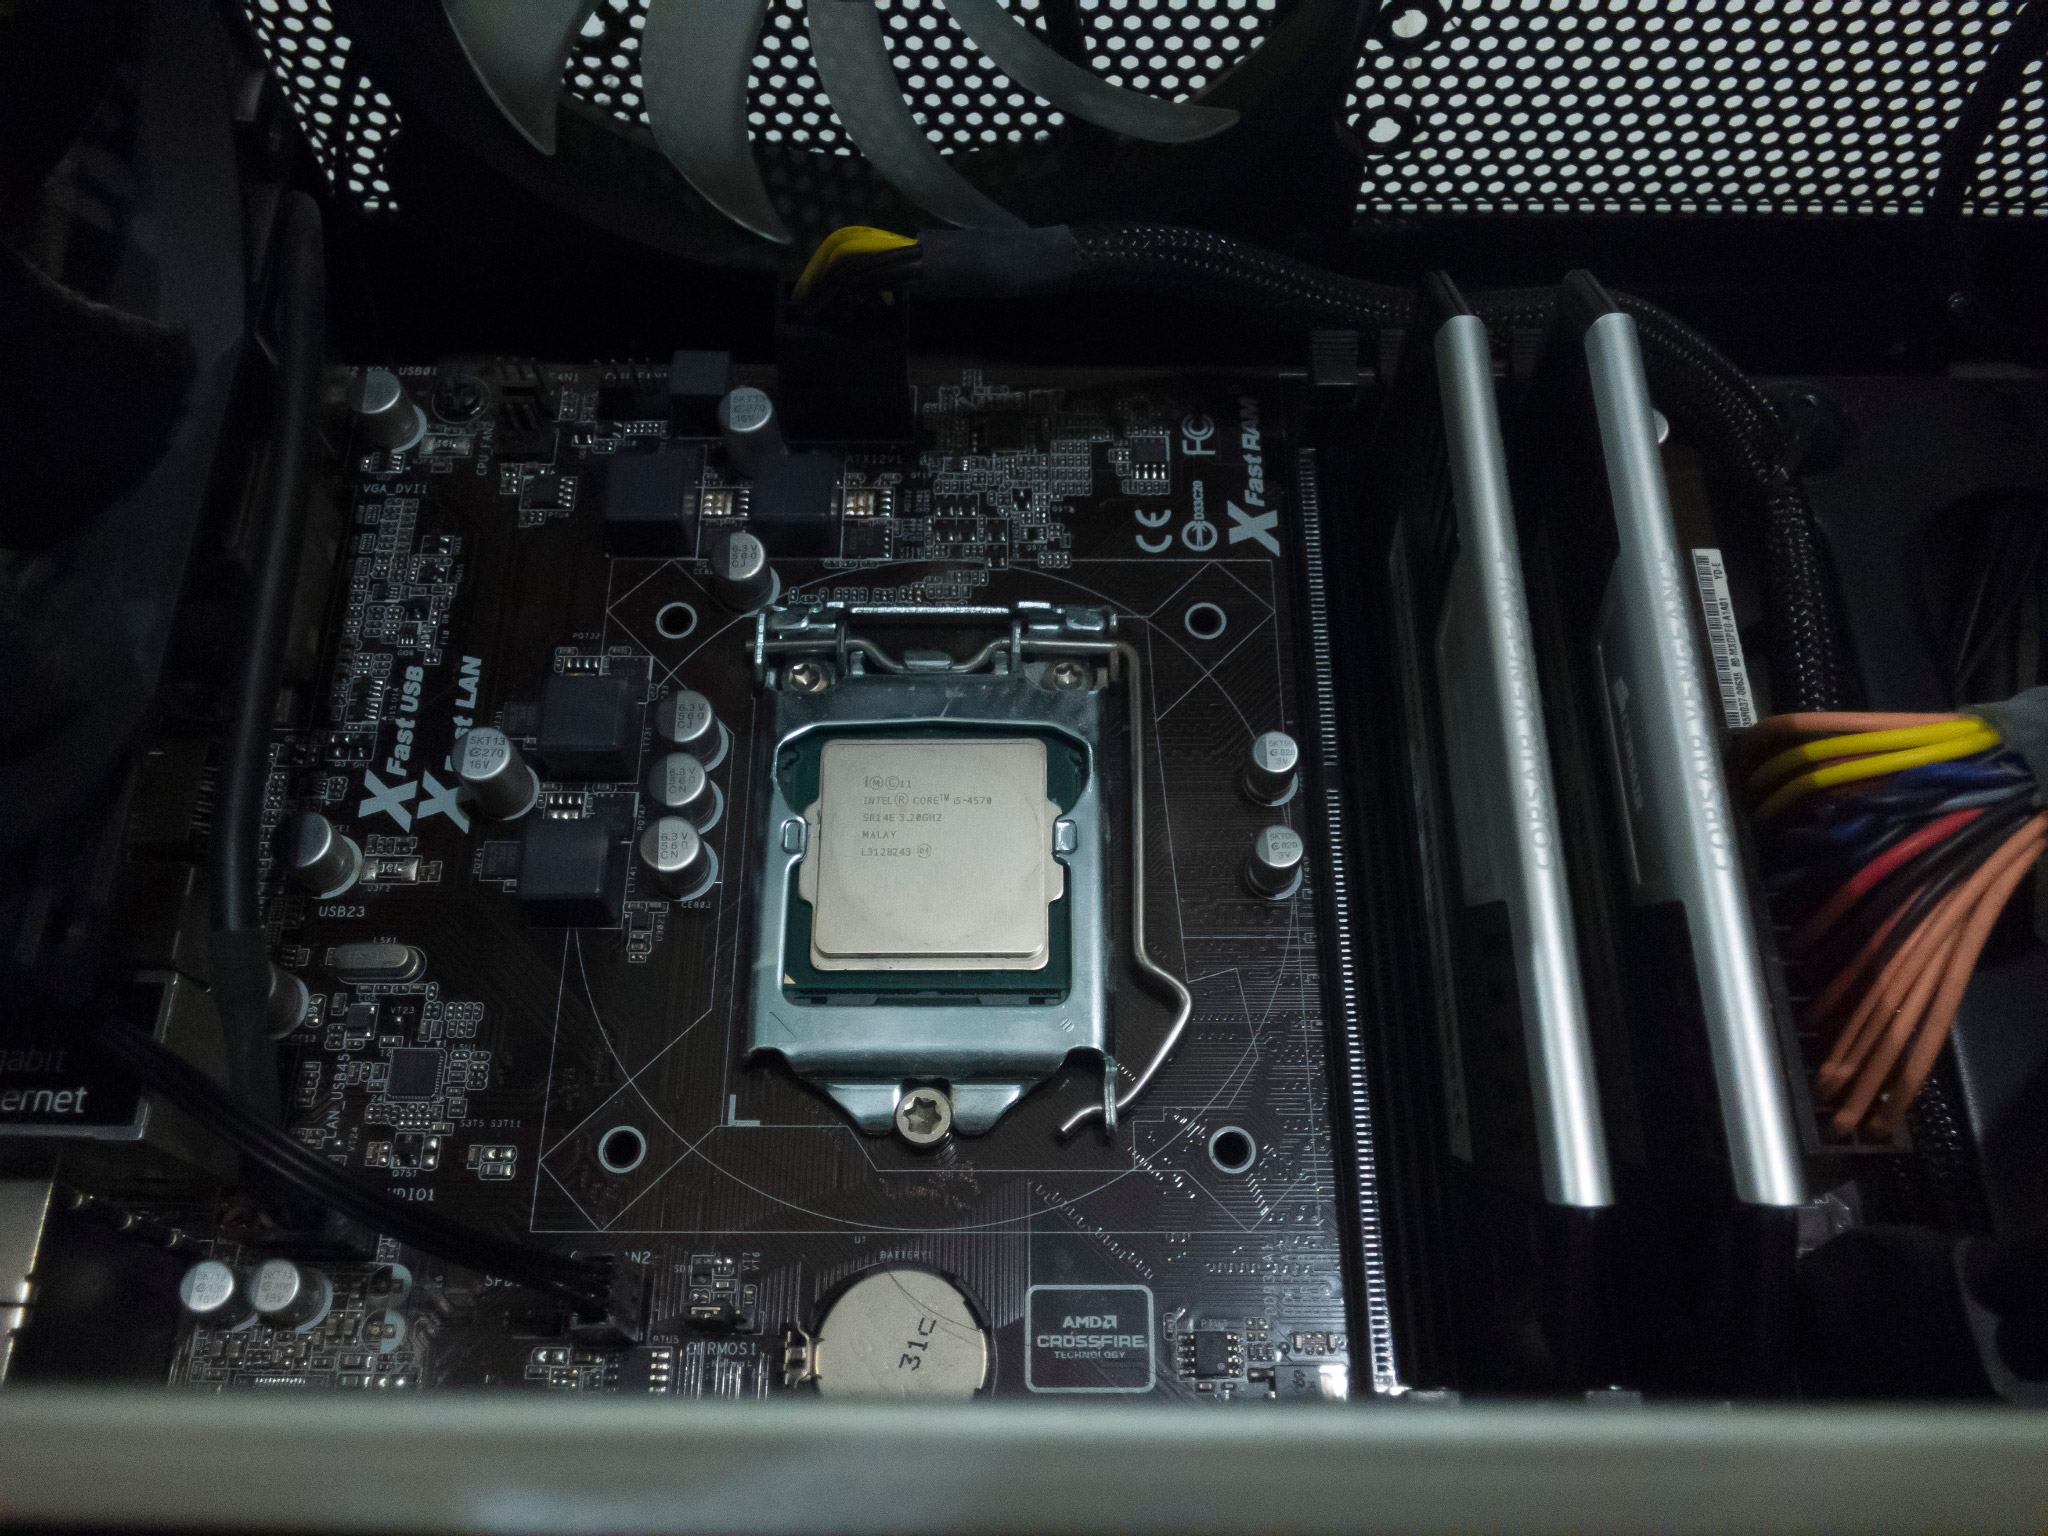
Removing the old thermal compound
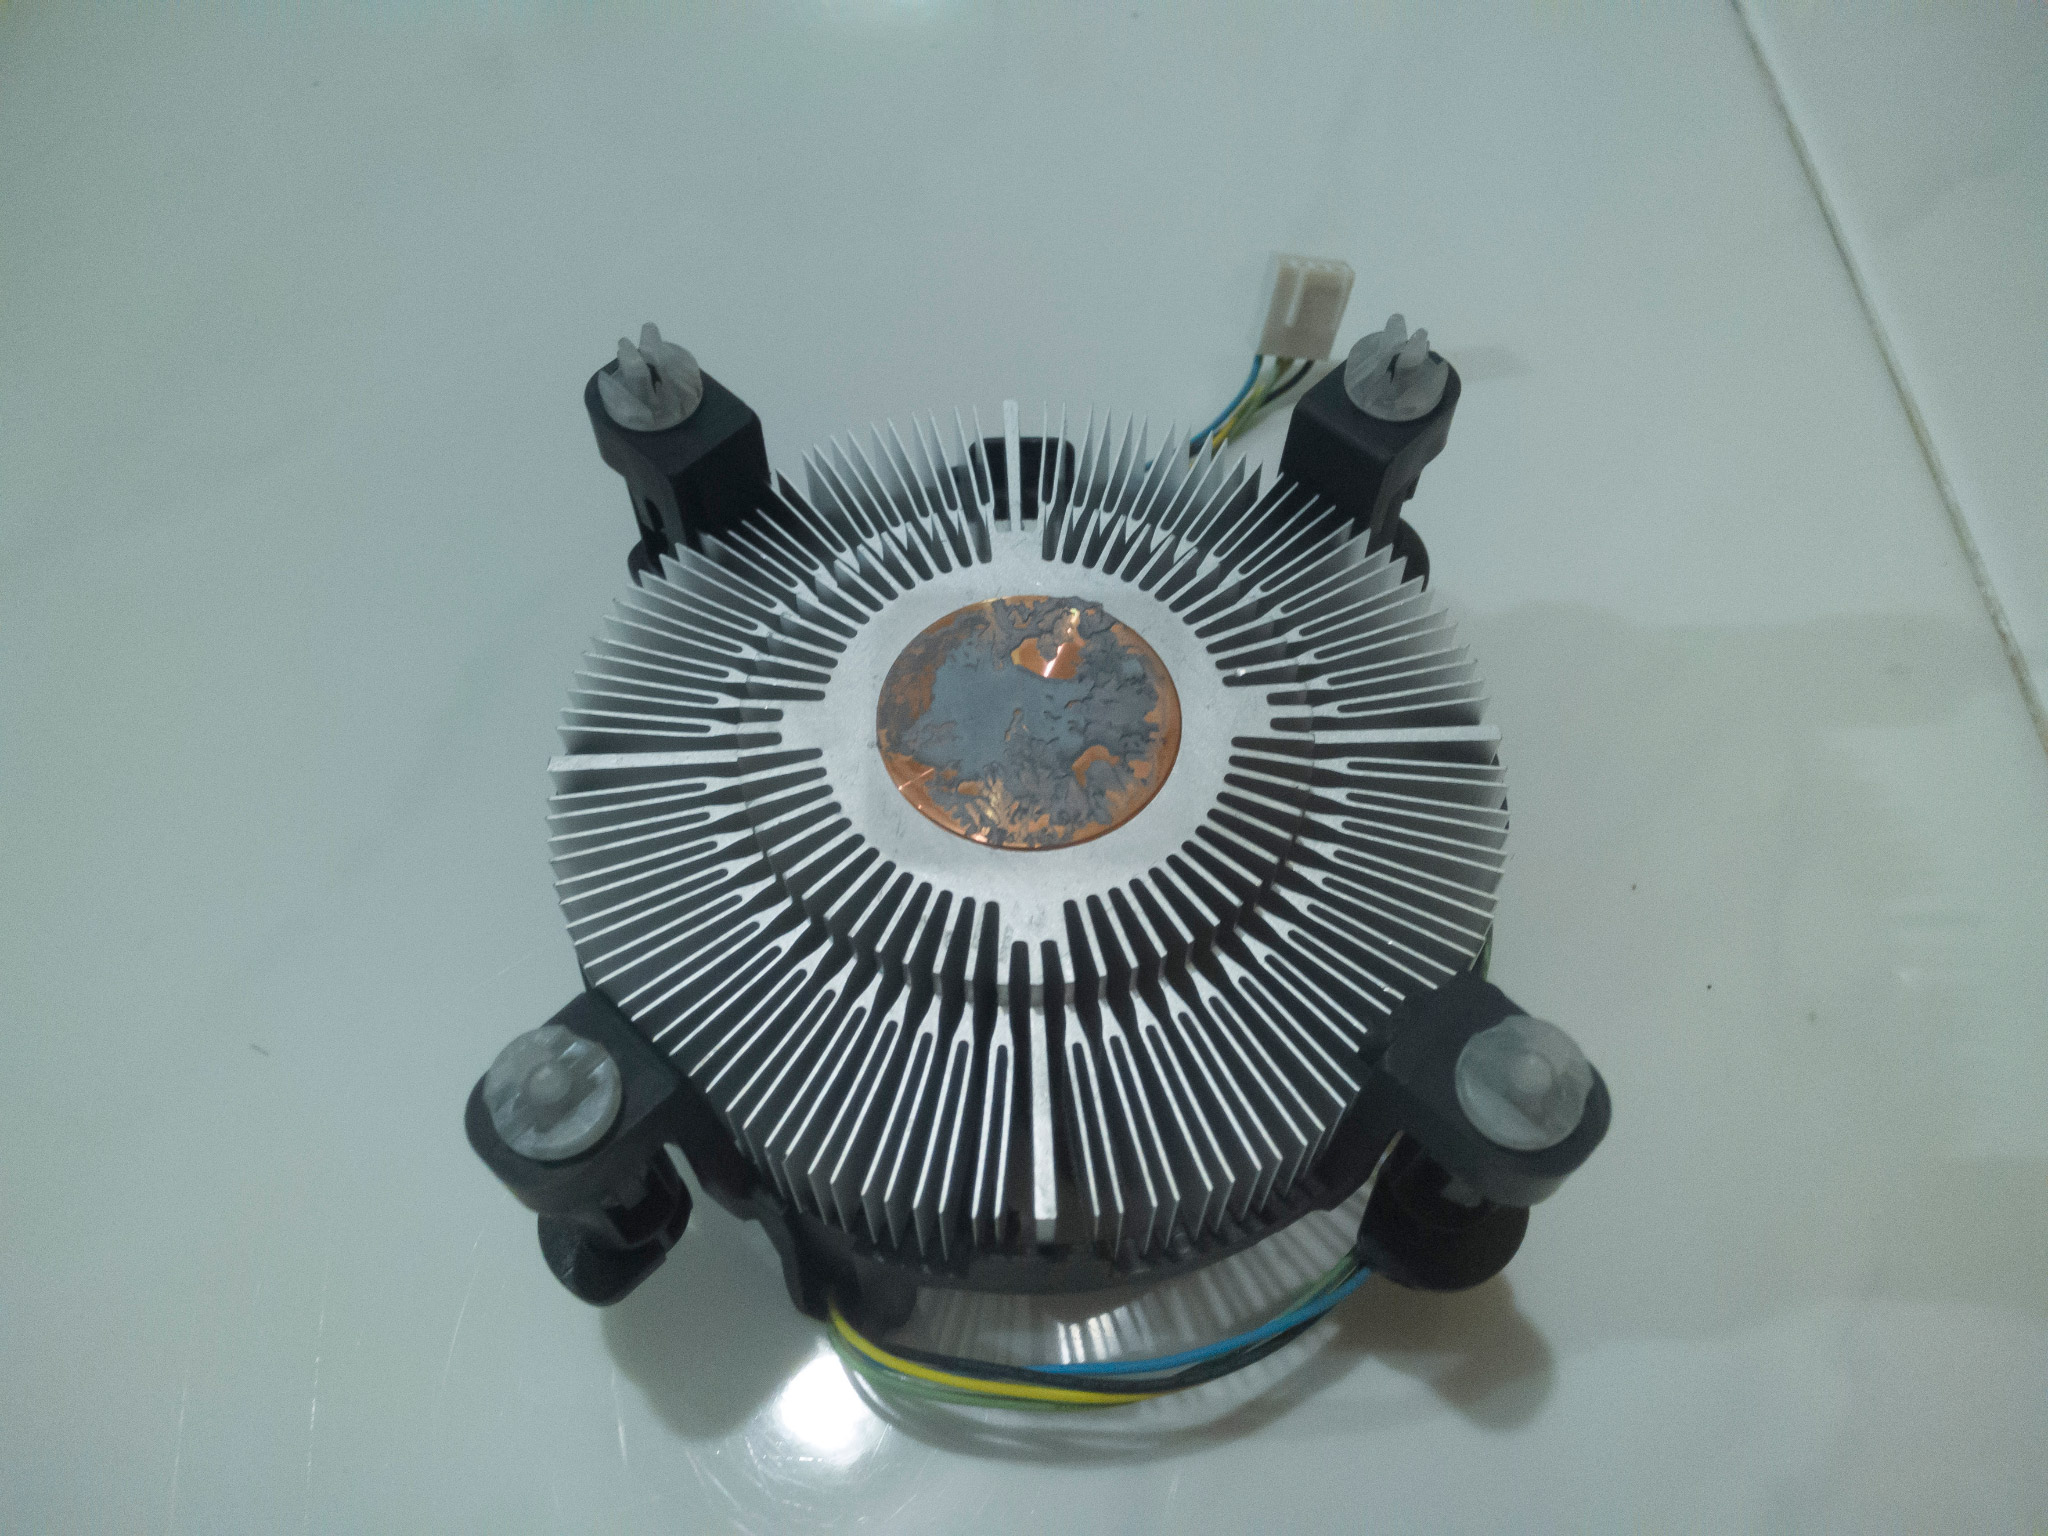
Set the cooler aside with the fan facing down and the heat sink, with the copper contact, facing up. The gunk that’s on the copper contact, as well as on the processor itself, is the thermal compound that came pre-applied to the boxed Intel CPU cooler. Take some time to appreciate the patterns created when the original thermal compound was broken apart by separating the heat sink from the processor, maybe even take pictures like I did, because you’re about to wipe them out of existence:

This is where your cleaning agent comes in. Needless to say, you’ll need to remove the old thermal compound from both the heat sink and the CPU. If the old stuff is completely hardened, you might need a while here — it took me a good 15 minutes to completely clean mine. Just take your time and don’t rush it. The last thing you want to do is make an even bigger mess out of the old thermal compound.
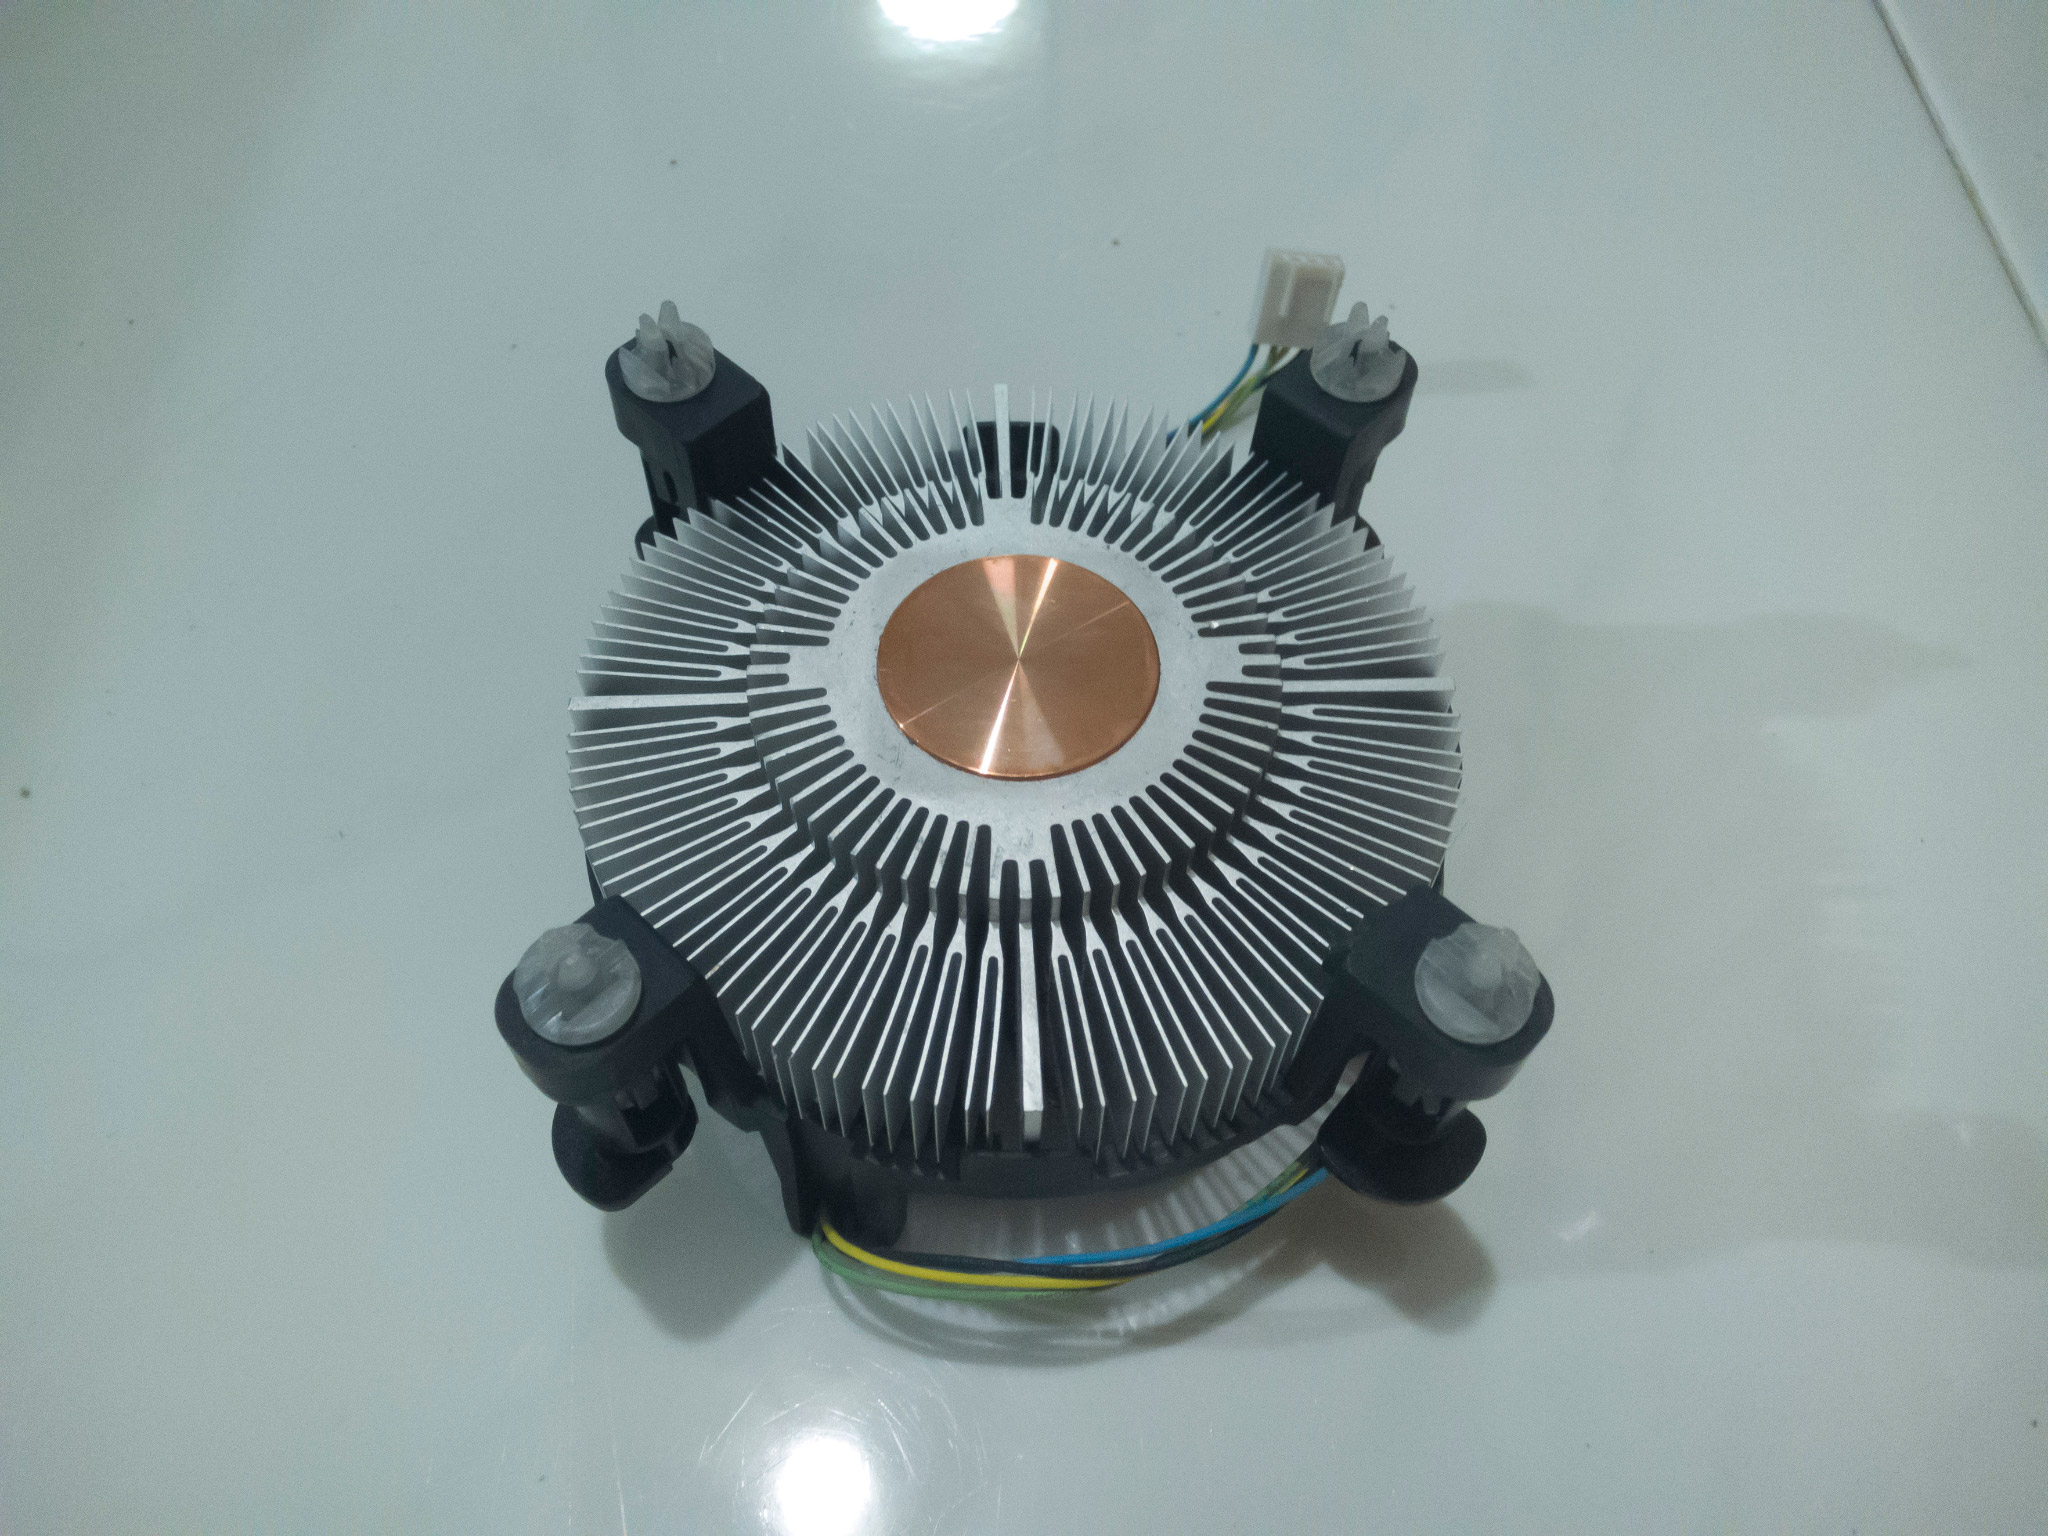
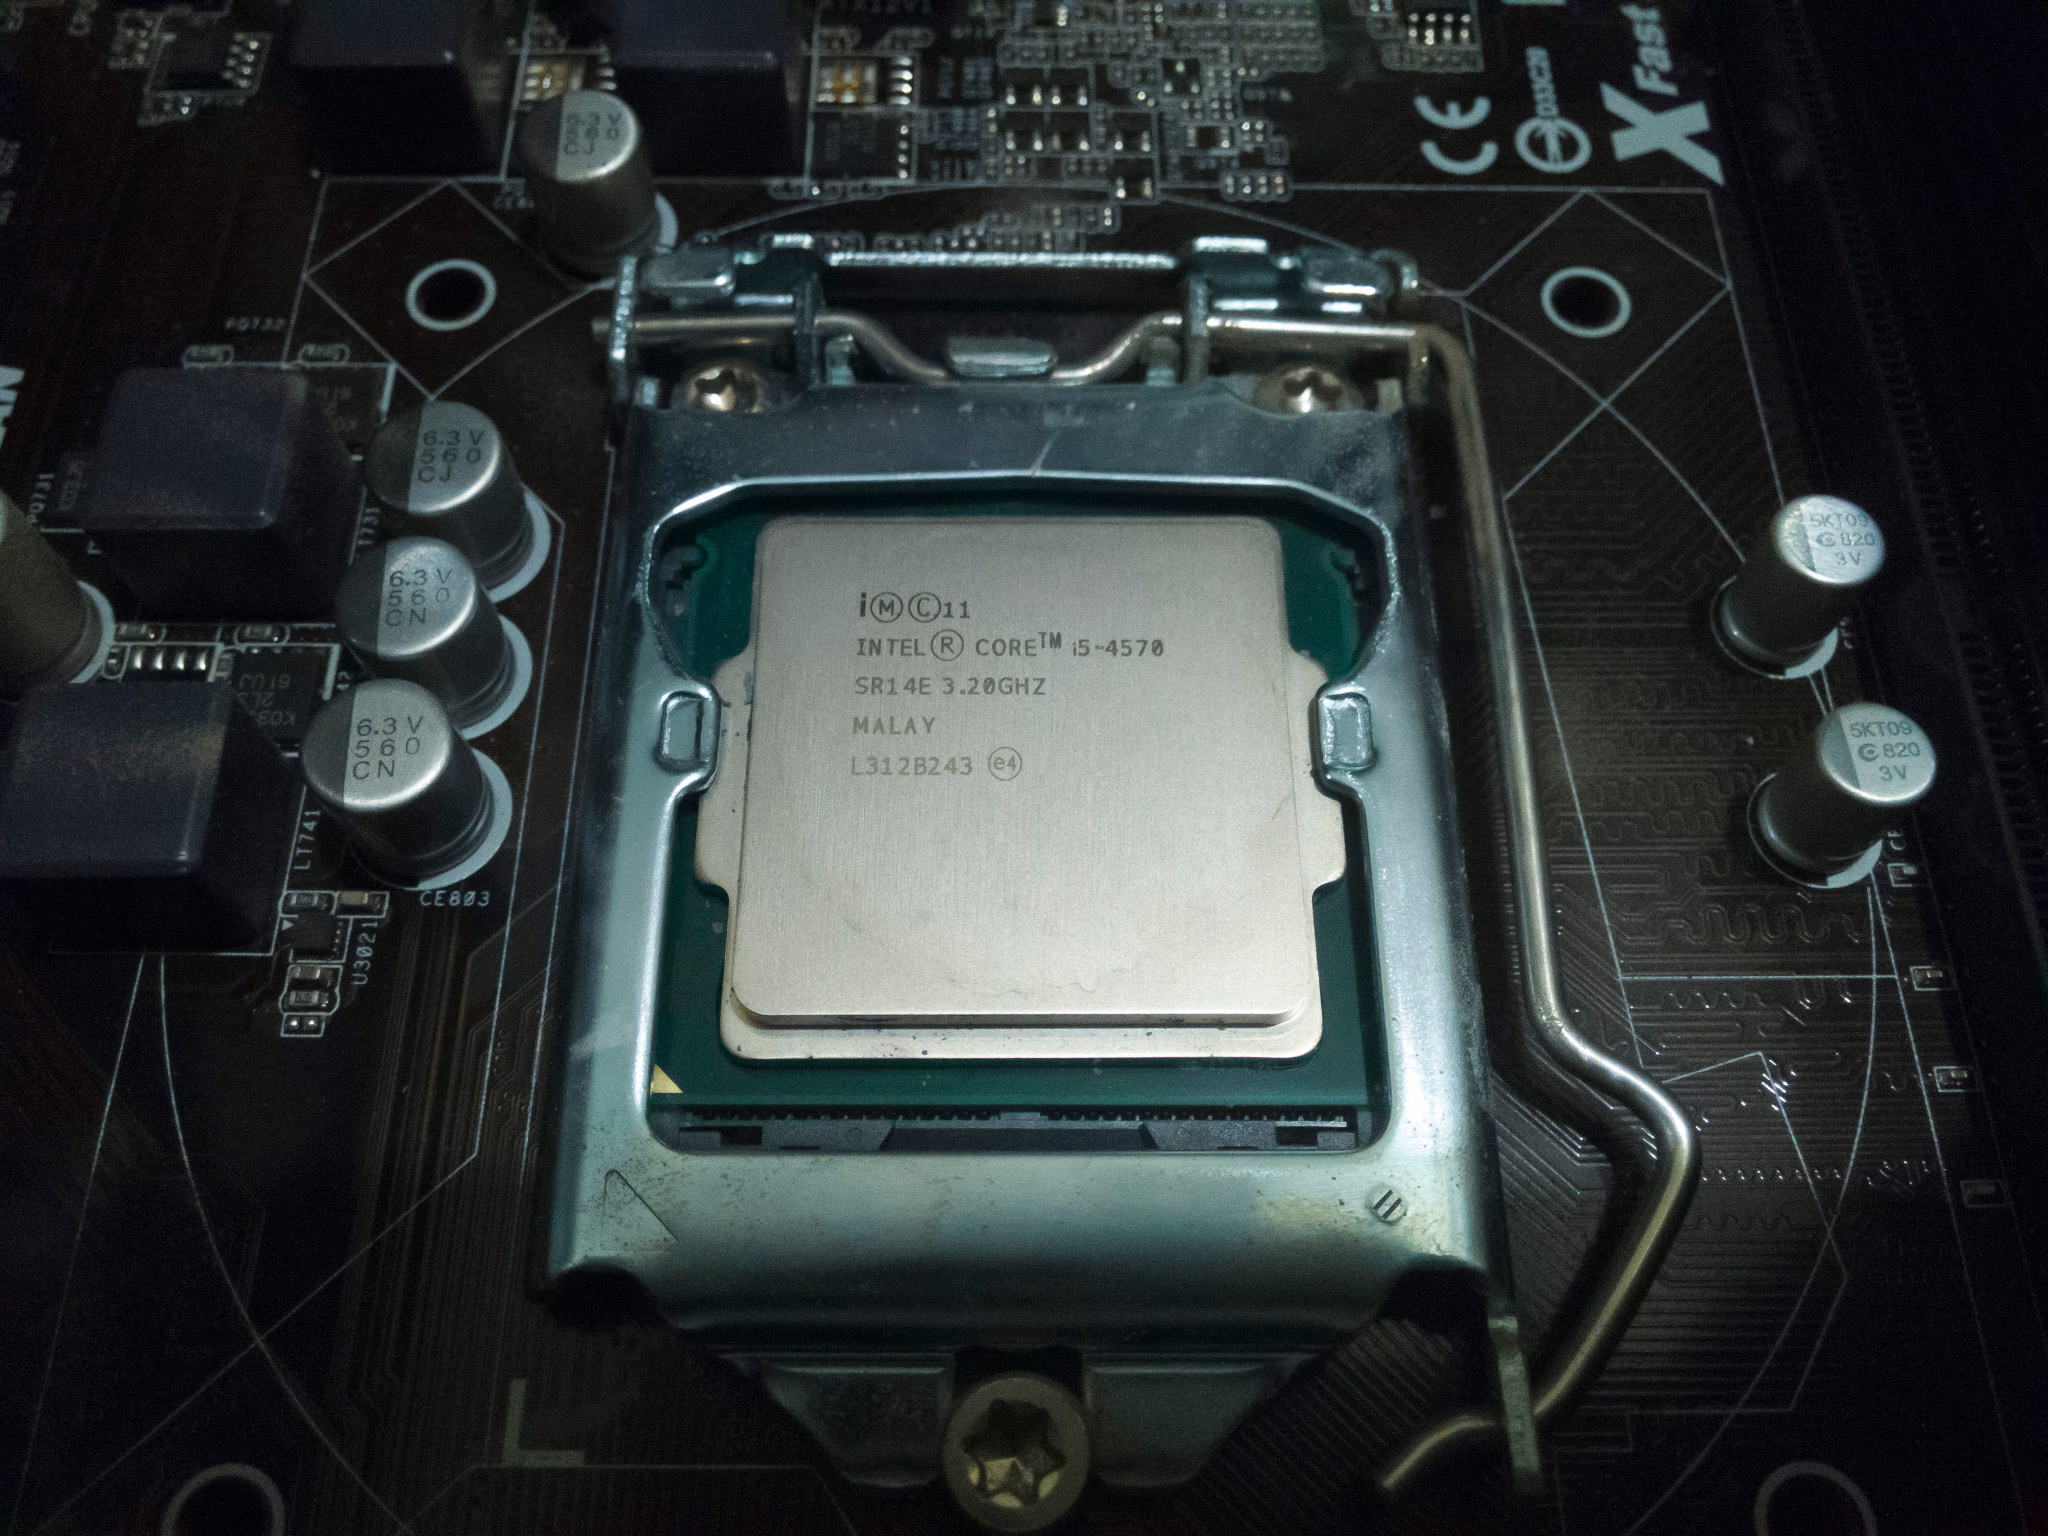
Alcohol evaporates so quickly you can literally watch it disappear before your very eyes, but there’s nothing wrong with wiping the surfaces dry if you want to make sure. Once your processor is clean and dry, you’re ready to apply the new thermal compound.
Applying the new thermal compound
No one on the Internet can agree on a single method of applying thermal compound, but the most common method by far (and one that Intel recommends, too) is with a pea-sized dollop. Make sure you put it as close to the middle of the processor surface as possible. If it’s noticeably off-center, it’s best that you remove it and try again, otherwise it won’t spread evenly to all sides of the processor surface. If you need to get a feel for applying just the right amount, there’s nothing wrong with testing it on some tissue — that’s exactly what I did. Just don’t waste too much of the stuff!
Here’s what mine looks like:
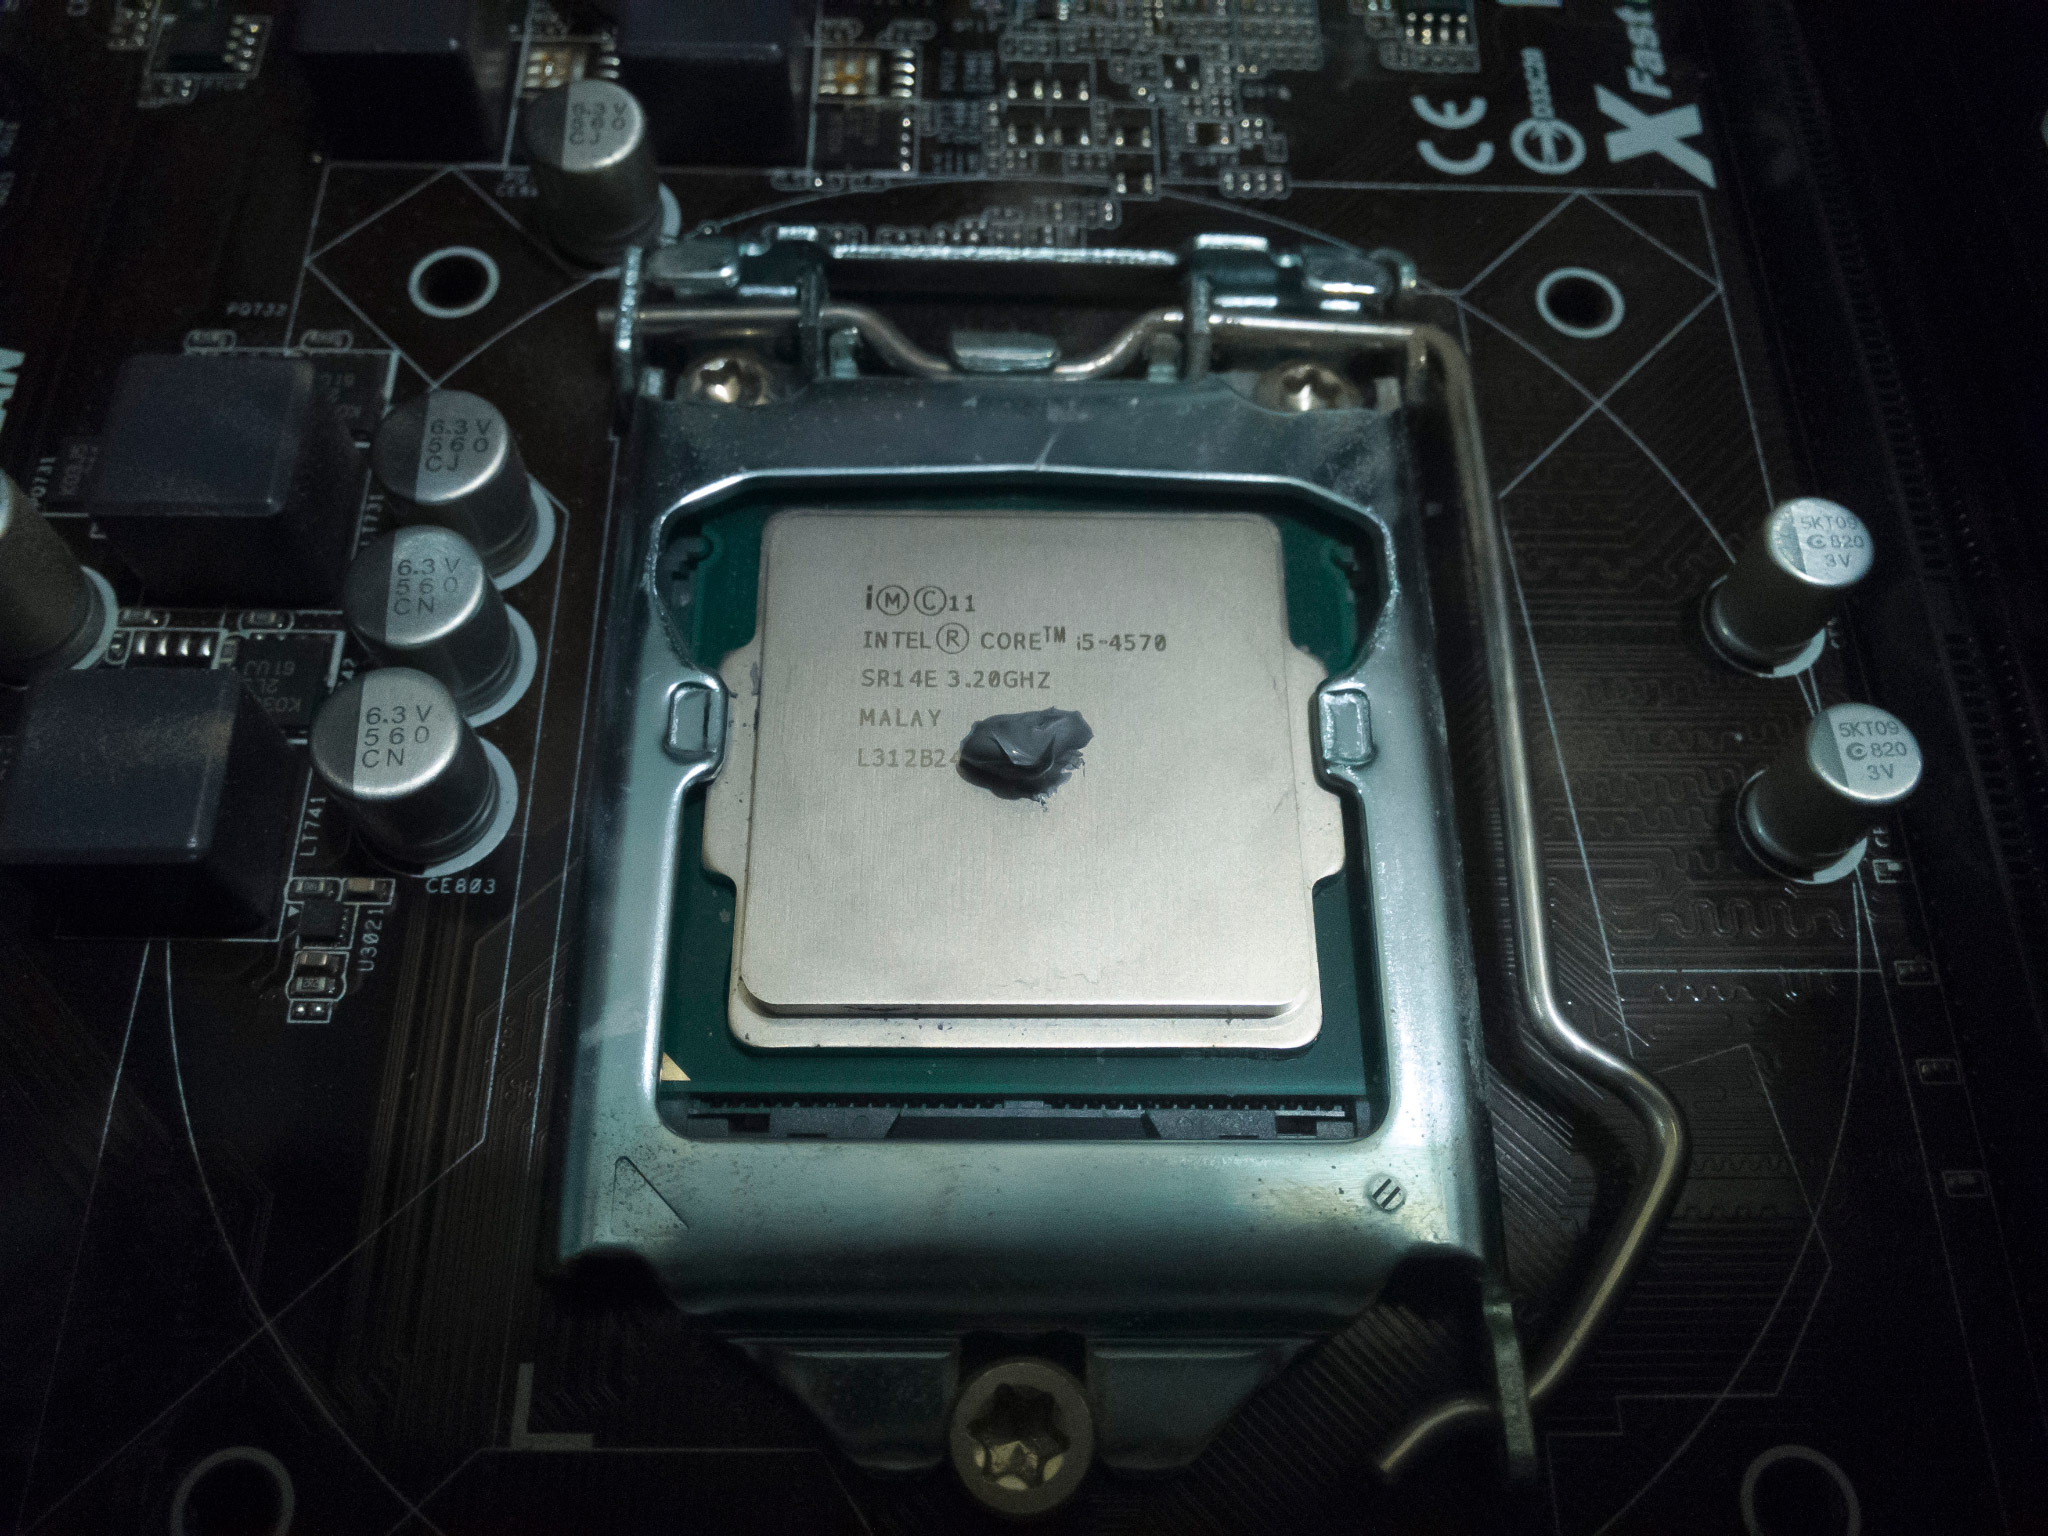
All that’s left now is to reseat the boxed Intel CPU fan over the processor. The pressure from the heat sink will flatten and spread the thermal compound evenly across the processor surface, so you don’t have to worry about doing that yourself.
Reinstalling the fan
Before you start, be sure to reset the push pins by turning each of them 90° clockwise.
The pins are arranged in a square, so you can orient the fan in any direction, not just how it was before you removed it, so don’t worry if you didn’t remember which way it was before you started.
Hold the fan above your motherboard as horizontally as possible, aligning the clips on the bottom of the pins with the four holes around your processor. Then gently lower it and once you feel the heat sink touching the board, let go. If you need to adjust it to get the pins to line up with the holes, shimmy it horizontally — and only very slightly so as not to disturb the thermal compound too much. Unfortunately I don’t have any photos or a video for this, but hopefully my description helps.
Once you have let go of the fan, press each push pin down until you hear a fairly loud click. That’s the sound of the clip at the end of each pin. You will need to do this in a specific order to ensure that the heat sink remains horizontal as much as possible. Intel’s guide has a diagram to illustrate (and don’t worry, I’m not hotlinking it):
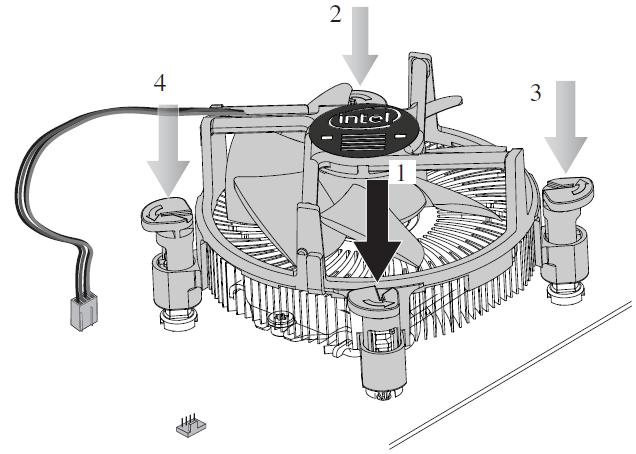
After you’ve made sure the entire fan construction is secure, plug the fan connector back into the header. You’re done!
Well, not quite; you do need to plug your PC back in and make sure it boots. But very few things can go wrong in this entire procedure as long as you’re careful and don’t make a mess.
My results
Like how dusting off the fans didn’t help in my case, there is no guarantee that replacing the thermal compound on your CPU is going to yield improvements in thermal performance, let alone frame rates in CPU-dependent games. I ran some benchmarks before replacing my thermal compound, then reran them after I was done. I ran the following tests:
For reference, along with the Intel Core i5-4570 my PC Radiance has 8 GB of DDR3-1600 RAM and an AMD Radeon RX 480 video card with 4 GB of VRAM. If you’re a new reader, I have an entire section of my site devoted to my battlestation where you can learn more about Radiance and other devices I own!
Visual Studio performance
Two metrics were analyzed:
- CPU core temperatures
- Time taken to compile
My test consisted of compiling Emergency Chat UWP in Visual Studio 2015 Update 3, using Store > Create App Packages to build x86, x64 and ARM packages at one go with the .NET Native toolchain (which is known to be really, really slow). After each build I cleaned the entire solution in all three configurations to ensure that everything was recompiled in subsequent builds. Each set of tests consisted of 3 builds.
My processor didn’t reach 100 degrees from just compiling Emergency Chat, but it was in the upper 70s for sure. The results here, though, are looking promising:
Unfortunately the standard deviation of the compile times was more than 10 seconds in both sets of tests, so even if I told you that the average compile times in the two runs were 10 seconds apart, that’s not going to tell you anything. So let’s just say that the build always took between 4 and a half minutes and 5 minutes, and that there was no perceptible change to compile times.
But what the hell — my processor is only topping off at 72°C, staying in the 60s for the majority of the build time (when not on its 100% usage spikes). That’s an overall improvement of 10°C! Not too shabby, since MSBuild isn’t terribly demanding to begin with.
Game performance
Again, two metrics were analyzed:
- CPU core temperatures
- Frame rates
I followed this guide by the excellent GamersNexus in my frame rate analysis; although it says it’s for benchmarking GPU performance, since I simply wanted to see if frame rates would be affected at all and I would be monitoring both simultaneously I figured it would still be useful. In a nutshell:
- Test a specific and easily repeatable scenario with as few variations as possible
- For frame rates, focus on averages, 1% lows and 0.1% lows to determine the severity of stuttering
- Repeat each test 3 times for parity
As this was also about seeing how hot my CPU would get under prolonged load in real-world situations (i.e. without using something like Prime95), I read temperatures off Core Temp once per game test (i.e. once per set of 3 runs).
Dishonored 2
Test scenario: traversing the bustling streets of Karnaca in the mission Edge of the World, via running, jumping and Far Reach.

| Average | 1% Low | 0.1% Low | |
|---|---|---|---|
| Before | 66 | 51 | 44 |
| After | 63 | 48 | 43 |
You’ll have to excuse my pun, because I am seriously blown away by these temperatures. My processor hovers just over 70°C when playing Dishonored 2 now. That’s an improvement of over 20°C! All I did was replace the thermal compound! What in the Void?!
On the flip side, leave it to a poorly optimized game like Dishonored 2 to scale negatively in frame rates in a situation like this. But in all seriousness, even if we didn’t dismiss the frame rate difference as negligible, it’s still extremely small. So I’m just going to deem it negligible, because I literally just clocked my 400th hour into the game according to Steam despite all the performance problems I’ve had to bear with, and I’m not planning on quitting anytime soon. The game is playable, and I’ve gotten way more than my money’s worth out of it (yes, I preordered the game, and I almost never preorder anything).
Anyway, let’s see the thermal performance in the other games. This is too good to be true.
Grand Theft Auto V
Test scenario: driving around Downtown Los Santos in Franklin’s personal vehicle. Population Density is maxed out. Franklin’s special ability is activated for 3 seconds at a specific turn in each test run (not that it matters much, but hey, details).

| Average | 1% Low | 0.1% Low | |
|---|---|---|---|
| Before | 62 | 43 | 36 |
| After | 68 | 55 | 46 |
My processor briefly crossed the 80-degree mark a few times. It spent most of the game time in at least 80% usage, which is no surprise given the kind of game GTA V is. But besides the 20-degree improvement that’s also apparent in this game, check out the frame rates, especially the 1% and 0.1% lows. The average frame rate has increased by nearly 10%, and the lows are significantly closer to the average, having improved by an unprecedented 28%!
And it definitely feels the part too — the noticeable stuttering I’d been experiencing before is all but gone and the game feels much smoother. I’m pegging this one as a great success.
… I mean, I’m happy with the temperatures reported in Dishonored 2 as well, so I guess that’s a success too. Just not as great as the results for GTA V.
Battlefield 1
Test scenario: capturing Kitchener’s Ridge in the mission Over the Top, in the war story Through Mud and Blood. Many AI soldiers with minds of their own and not much in the way of scripted behavior. I would have chosen Storm of Steel, but it has no checkpoints and takes forever to load from the intro cutscene, which made it impractical.
| Average | 1% Low | 0.1% Low | |
|---|---|---|---|
| Before | 68 | 48 | 42 |
| After | 68 | 50 | 44 |
I’m not so sure I can say that there was a real improvement in frame rates and frame times in Battlefield 1. Yes, you can see slight improvements in the lows, bringing them closer to the average, but compare them to the results for GTA V and you’ll find that the deltas here are still larger both proportionally and absolutely. Even without having the numbers at the forefront of my mind, GTA V just feels smoother overall, while Battlefield 1 feels the same.
As for temperatures, my processor peaked at the mid-80s and stayed in the high 70s most of the time. That’s still an improvement of 15–20°C.
Conclusion
Alright, I know this has been really long but I hope this step-by-step guide has been helpful to you. No doubt this has been a valuable experience for me. Even if my Intel Core i5-4570 had shown no sign of improvement, at least I finally got hands-on with a CPU cooler beyond the initial installation. But as you’ve seen, it showed remarkable improvement in my case, which means this sort of thing really can make all the difference.
Even my big brother was floored. He said he was expecting maybe a 5-degree improvement… but here I am with a processor running 15 to 20 degrees cooler than however long it’d been capping off at the boiling point of water.
The frame rates are pretty much the same, but those aren’t the focus here. The focus is on getting the temperatures down. And I’d say that my expectations were far, far exceeded. I no longer have to worry about my CPU throttling itself heavily because now its heat sink can actually do its job of pulling heat away from it again.
According to Noctua, the NT-H1 will be good for many years. It better be — I just added it to PCPartPicker as the seventh revision to Radiance! (I trust Noctua, of course.)
1 comment
Yes, thermal compound does help dissipate the heat rapidly. You may also want to try attaching a Peltier cooling element to the processor (you can get one from Sim Lim Square for less than $30, if I’m not wrong), which will aid in accelerating the rate of cooling of the processor. Alternatively, get a GPU to take on most of the computing load.
Comments are closed.